How to Manage GitLab with Terraform
The guide covers using the Terraform provider for GitLab to configure, authenticate, create core resources like groups & projects, and use the Terraform state backend and module registry.

- The gitlabhq/gitlab Terraform provider lets you manage GitLab as code, codifying repository settings, group structures, permissions, and security policies for consistency and auditing.
- Authentication uses access tokens: a Personal Access Token with api and read_api scopes for local development, and the predefined CI_JOB_TOKEN for production CI/CD automation.
- Core resources you can define include groups and subgroups, projects, and group memberships with specific access levels like developer or maintainer.
- GitLab provides native Terraform support through an HTTP state backend with locking and a private module registry for publishing and sharing modules.
- Recommended next steps include codifying branch protection rules, building a full plan/apply CI/CD pipeline, and managing secrets with protected and masked CI/CD variables.
Managing GitLab resources with Terraform
With the gitlabhq/gitlab provider, you can manage GitLab resources using an Infrastructure as Code (IaC) approach to define, version, and automate the configuration of your GitLab environment. Because the configuration lives in code, settings stay consistent across projects, security policies get enforced the same way everywhere, and every change leaves an auditable history.
Why Manage GitLab with Terraform?
Managing GitLab as code helps with:
- Standardization: Codify repository settings, group structures, and permissions to ensure consistent configuration across all projects and prevent drift.
- Version Control & Auditing: Treat platform configuration as code, providing a complete, versioned history of all changes for auditing purposes.
- Security: Define and enforce security policies like branch protection rules programmatically across all projects, ensuring a consistent security posture.
- Automation & Efficiency: Automate the provisioning of projects and management of user access, reducing manual effort and accelerating project setup.
Provider Configuration and Authentication
First, you configure Terraform to talk to the GitLab API. Authentication uses access tokens, so handle them carefully.
1. Generate an Access Token For local development, a Personal Access Token (PAT) is the simplest way to do it.
- Navigate to your GitLab Preferences > Access Tokens.
- Assign a name, set an optional expiration, and grant the
apiandread_apiscopes. - Copy the generated token.
For production automation, using the predefined CI_JOB_TOKEN within GitLab CI/CD is the recommended and most secure practice.
2. Set Environment Variables Set the access token in your terminal session. The Terraform provider will pick up this variable automatically.
export GITLAB_TOKEN="your_gitlab_token_here"3. Define Provider Configuration Create a file named providers.tf to declare the GitLab provider and its configuration.
// providers.tf

terraform {
  required_providers {
    gitlab = {
      source  = "gitlabhq/gitlab"
      version = "~> 18.1"
    }
  }
}

// Configure the GitLab provider.
// Authentication is handled by the GITLAB_TOKEN environment variable.
provider "gitlab" {
  // For self-hosted instances, specify the API base URL.
  // base_url = "https://gitlab.example.com/api/v4/"
}
After creating this file, run terraform init to download and initialize the provider.
Resource Management Examples
The sections below show how to define the core GitLab resources.
1. Managing Groups and Subgroups In GitLab, Groups are used to organize projects and manage user access. On GitLab.com, top-level groups must be created in the UI first and then referenced via a data source.
// gitlab.tf

// Use a data source to reference an existing top-level group.
data "gitlab_group" "parent_group" {
  full_path = "your-existing-top-level-group" // Specify the full path of the parent group.
}

// Define a new subgroup for the project team.
resource "gitlab_group" "app_subgroup" {
  name             = "My Terraform App Team"
  path             = "my-terraform-app-team"
  parent_id        = data.gitlab_group.parent_group.id
  visibility_level = "private"
}
2. Managing Projects Projects (the equivalent of repositories) are created within a group's namespace.
// gitlab.tf

resource "gitlab_project" "app_project" {
  name             = "My First TF Project"
  namespace_id     = gitlab_group.app_subgroup.id
  description      = "Project created via Terraform."
  visibility_level = "private"
}
3. Managing Users and Group Membership You can assign existing users to groups with specific access levels.
// gitlab.tf

// Use a data source to find a user by username.
data "gitlab_user" "a_user" {
  username = "a-real-gitlab-username" // Specify a valid GitLab username.
}

// Add the user to the subgroup with "Developer" access.
resource "gitlab_group_membership" "user_membership" {
  group_id     = gitlab_group.app_subgroup.id
  user_id      = data.gitlab_user.a_user.id
  access_level = "developer" // Valid levels: guest, reporter, developer, maintainer, owner.
}- Execution and Deployment After defining the resources, use the standard Terraform workflow to deploy the changes.
- Review the Execution Plan:
terraform plan - Apply the Configuration:
terraform apply
Using GitLab for Terraform
GitLab provides native support for Terraform too.
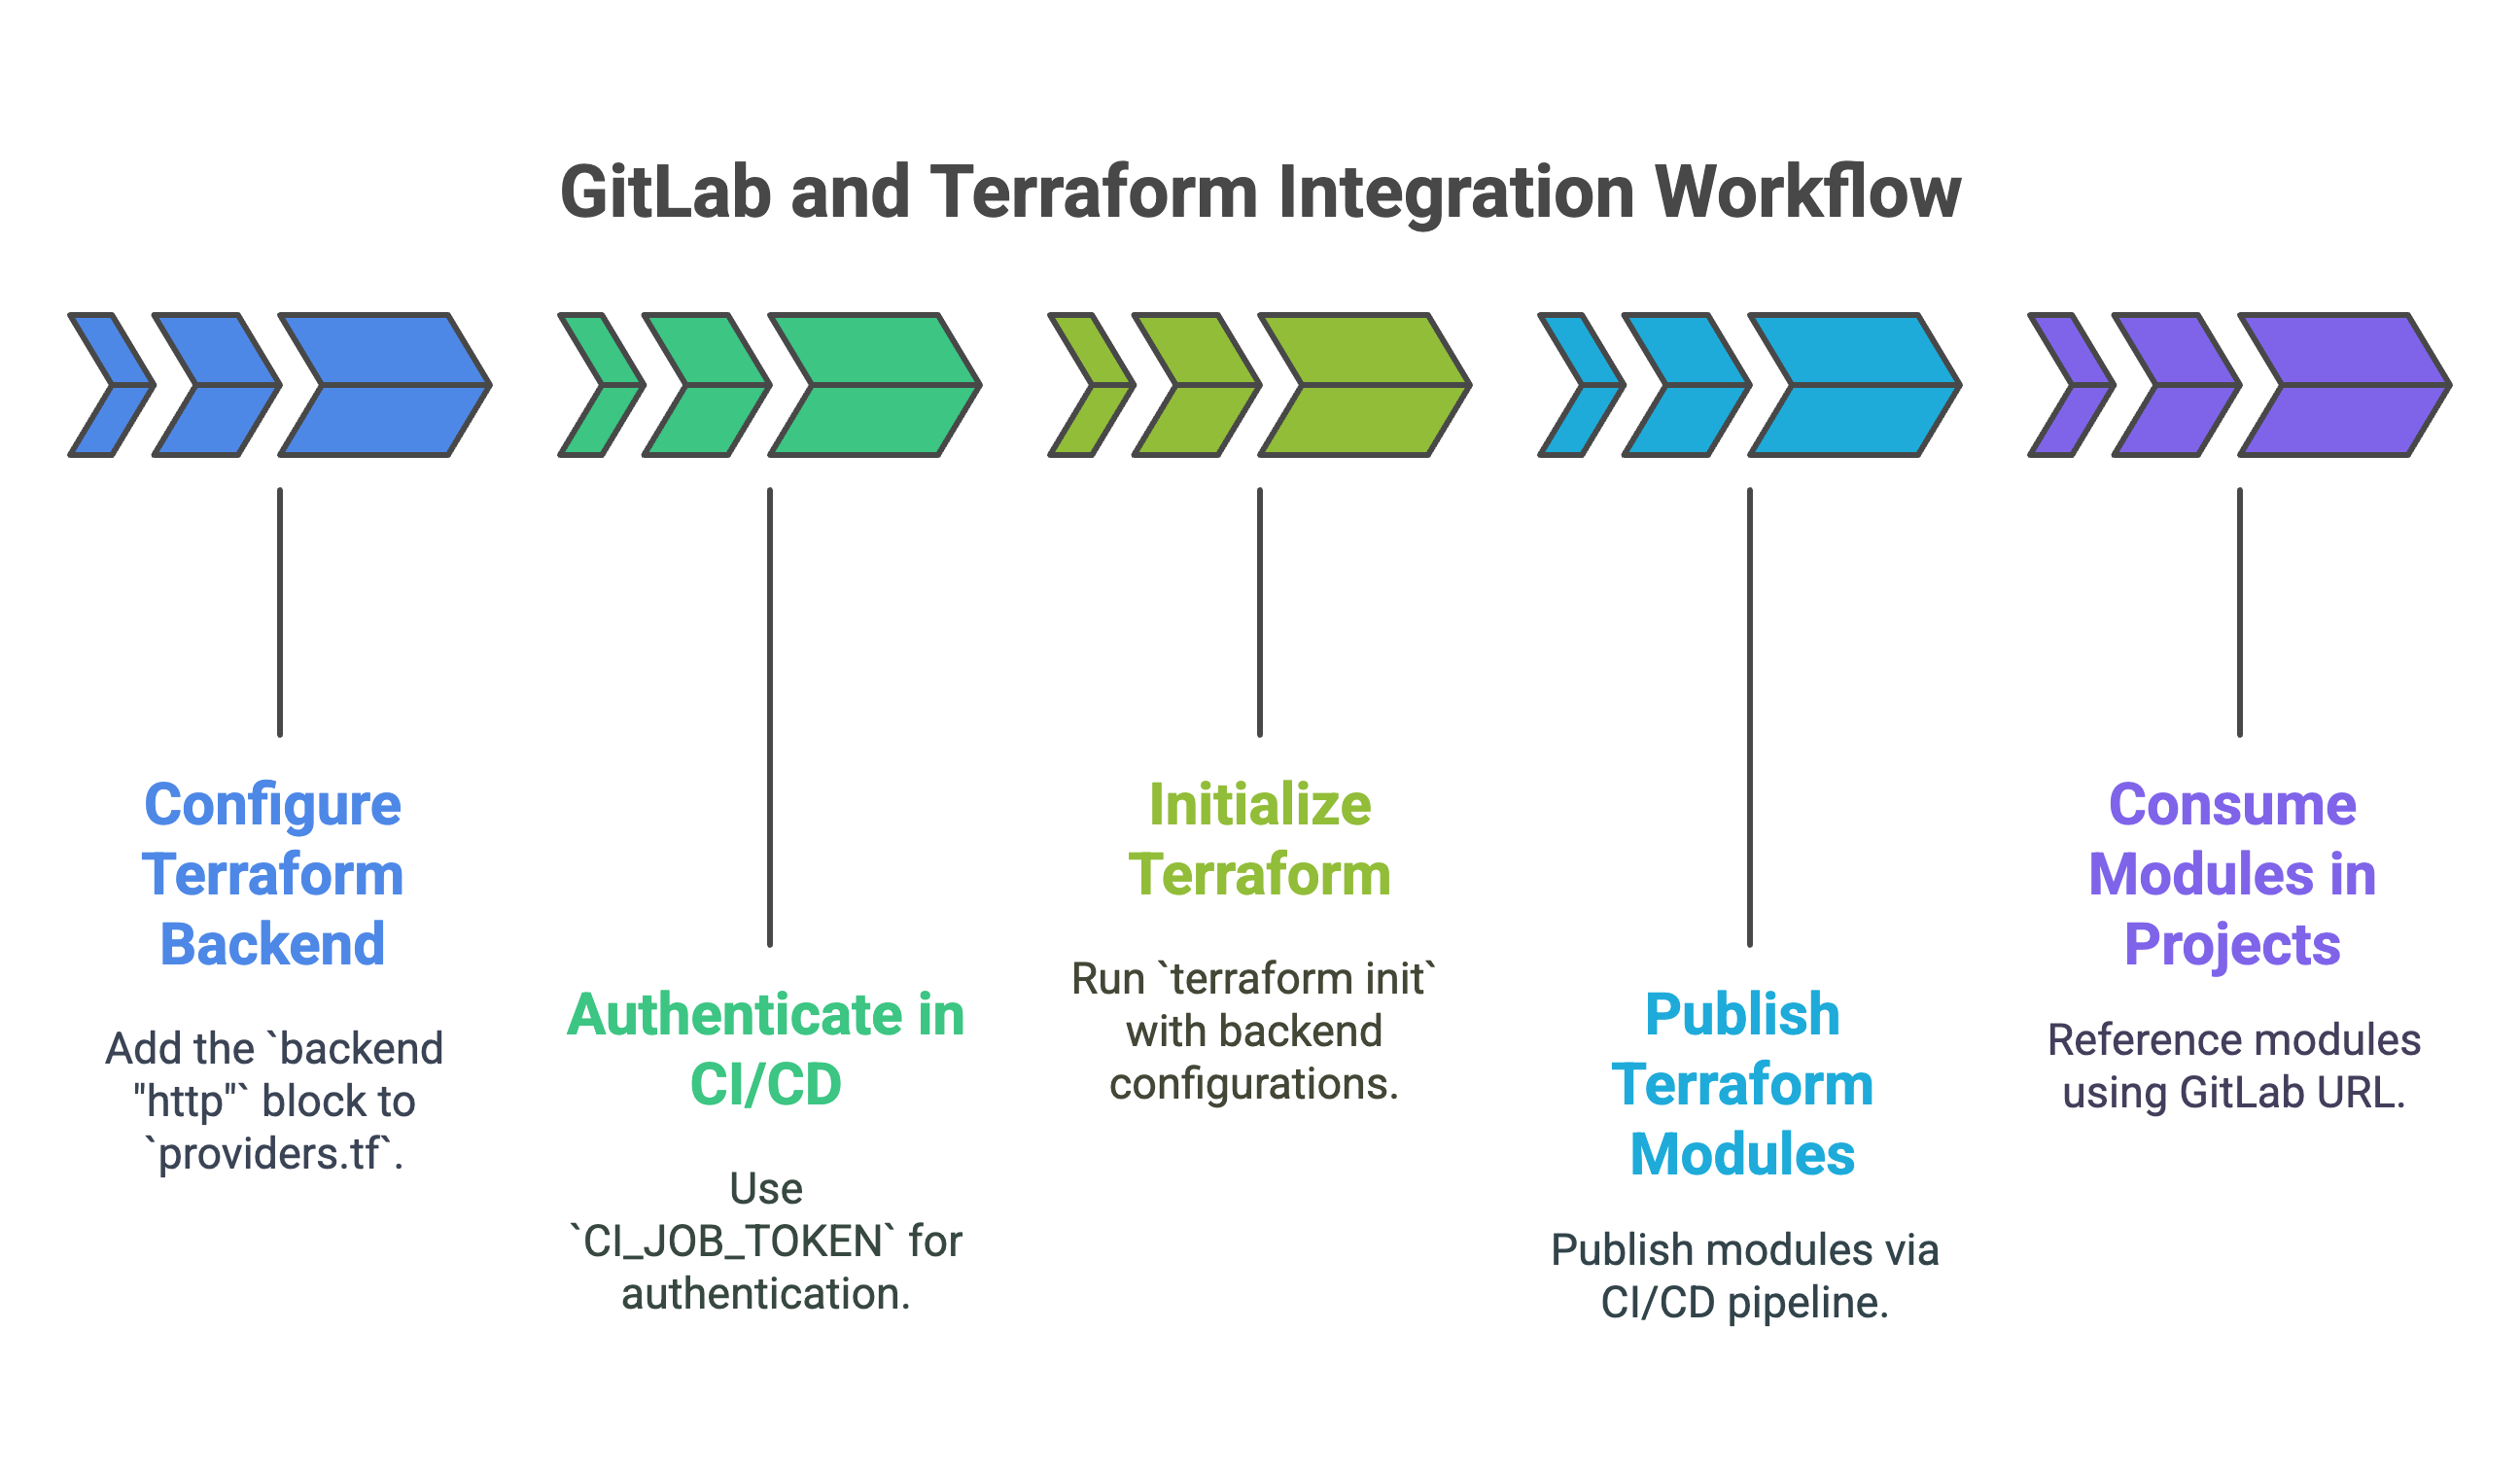
1. The GitLab-Managed Terraform State Backend GitLab gives you a built-in HTTP backend to store and lock your Terraform state file. You need this when a team shares the state.
- Configuration: Add the
backend "http"block to yourproviders.tf. - Authentication in CI/CD: The backend authenticates within GitLab CI/CD pipelines using the predefined
CI_JOB_TOKEN, eliminating the need to manage credentials manually.
Example CI/CD Initialization:
# In .gitlab-ci.yml
variables:
  TF_STATE_NAME: "default"
  TF_ADDRESS: "${CI_API_V4_URL}/projects/${CI_PROJECT_ID}/terraform/state/${TF_STATE_NAME}"

before_script:
  - terraform init -reconfigure \
      -backend-config="address=${TF_ADDRESS}" \
      -backend-config="lock_address=${TF_ADDRESS}/lock" \
      -backend-config="unlock_address=${TF_ADDRESS}/lock" \
      -backend-config="username=gitlab-ci-token" \
      -backend-config="password=${CI_JOB_TOKEN}" \
      -backend-config="lock_method=POST" \
      -backend-config="unlock_method=DELETE"
2. The Private GitLab Terraform Module Registry You can publish, version, and share your own Terraform modules privately inside your GitLab instance. That makes it easier to reuse code and keep it standard. You publish modules through a CI/CD pipeline, and other projects use them by referencing the module's GitLab URL.
Read more on how GitLab can help your team use Terraform.
Recommended Next Steps
- Branch Protection: Use the
gitlab_branch_protectionresource to codify rules for your branches, such as requiring merge request approvals. - CI/CD Integration: Build a full CI/CD pipeline in GitLab to automate the
planandapplycycle, using merge requests for review. - Secrets Management: Manage sensitive data like API keys using GitLab's protected and masked CI/CD variables.

Terraform Providers: Complete Configuration and Management Guide
Learn about what Terraform providers are and how to use them with examples.