Deploying your infrastructure with Scalr and GitHub Actions
A tutorial explaining how to use GitHub Actions and Scalr together

- You can deploy Terraform with Scalr as the remote state backend and GitHub Actions as the orchestrator that runs init, plan, and apply.
- In Scalr, create a CLI-source workspace, a service account with account, environment, and workspace access, and a token for GitHub to authenticate.
- Store the Scalr token as a GitHub repository secret named SCALR_TOKEN so GitHub Actions can perform state operations on the workspace.
- The Terraform backend remote block needs the Scalr hostname, the environment ID as organization, and the workspace name, all copyable from the Scalr workspace page.
- A GitHub Actions workflow using the Scalr/scalr-action then runs terraform init, plan, and apply on every push to the main branch.
This post walks through deploying infrastructure with Terraform using Scalr and GitHub Actions together. Scalr holds the Terraform state as the remote backend, and GitHub Actions runs the Terraform commands.
If you're new to Scalr, I'd start with the Introduction and Getting Started pages. They cover enough to get you going. This post assumes you already have a Scalr Organization and Environment set up and ready to go.
How Do You Set Up the Service Account, Token, and Workspace in Scalr?
First we need to set up a few things in Scalr: a Service Account, a Token, and a Workspace. Once those are in place we can connect to GitHub and start running some Terraform.
- From the Scalr Environment dashboard we are going to be clicking on Create workspace.
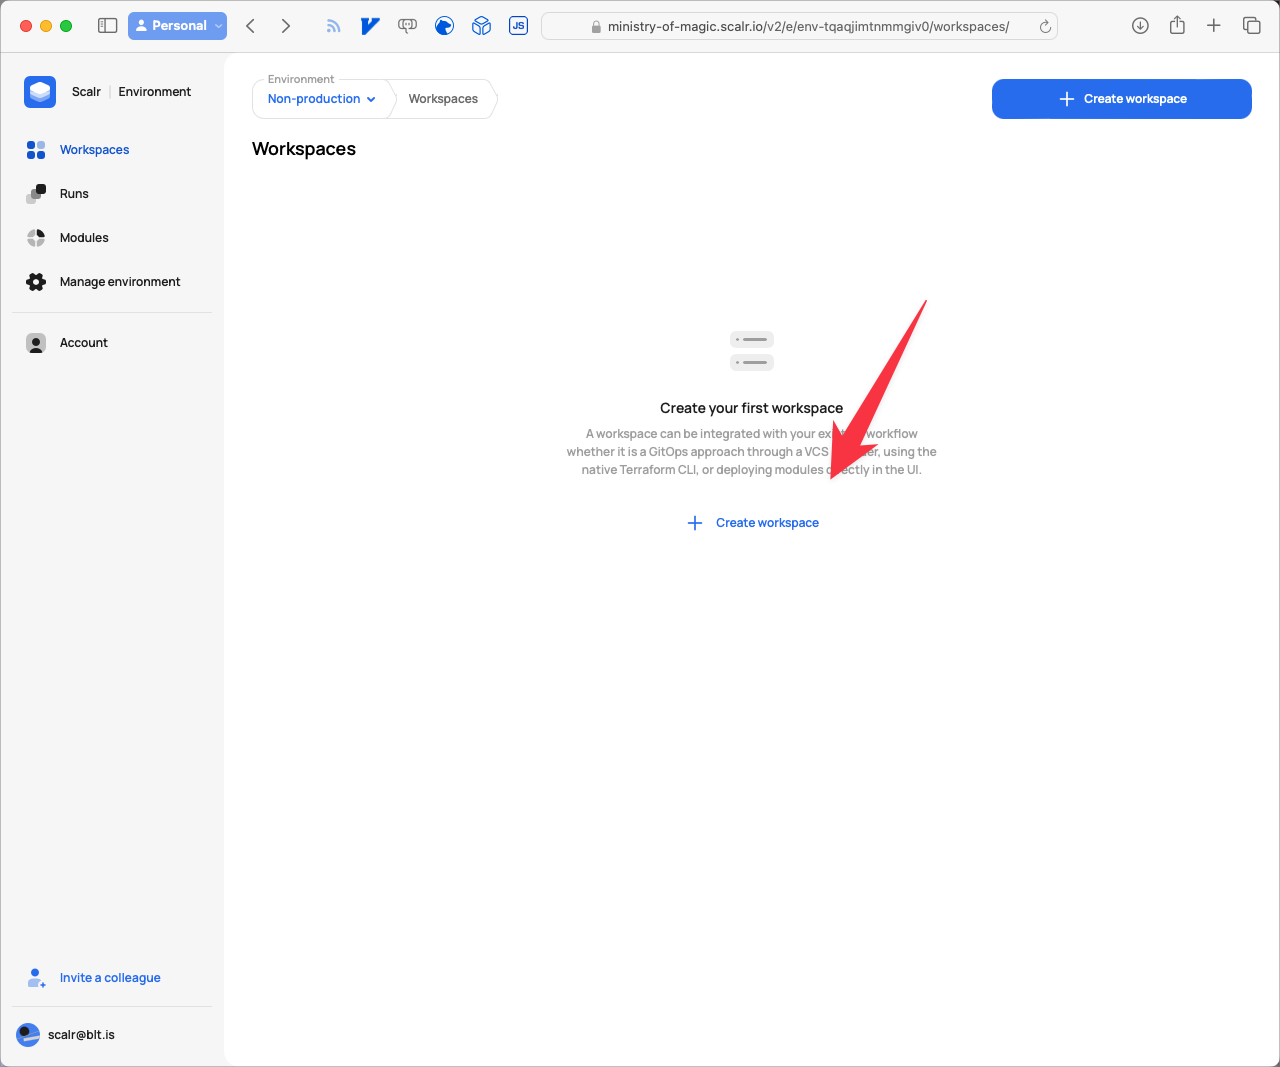
Empty State of the Workspace Dashboard in Scalr
- Give the workspace a Name that makes sense for your situation, and ensure you select CLI as the Source as we will be using GitHub Actions as our orchestrator rather than Scalr itself. Finally click on Create workspace.
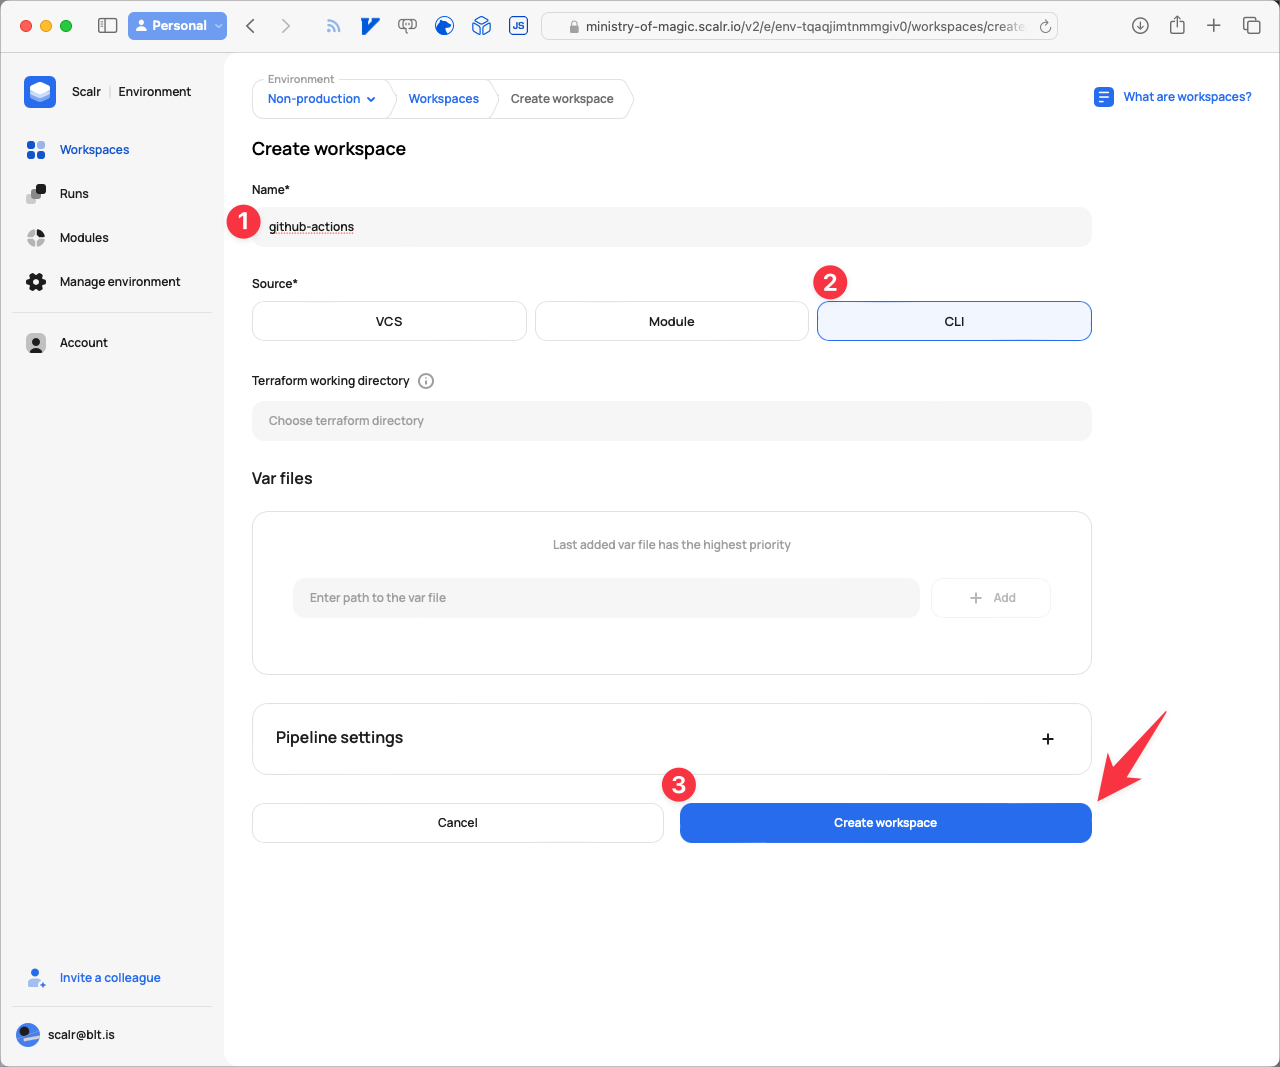
Creating a CLI based workspace
- The next step is going to be setting up a Service Account for GitHub to authenticate with. Click on Account.
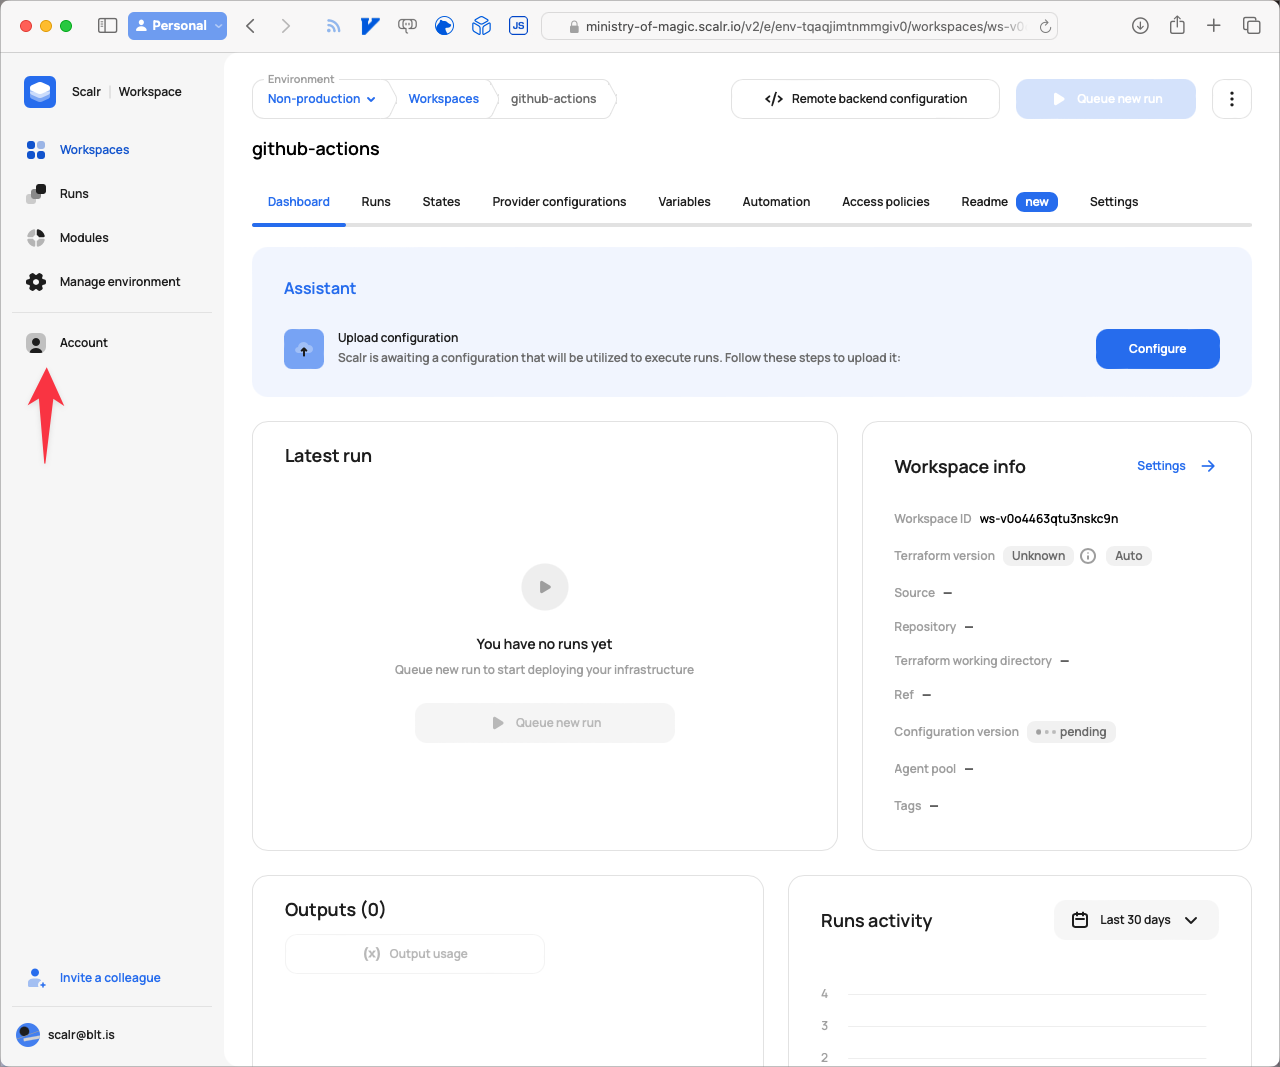
Navigating to Account
- Next click on IAM.
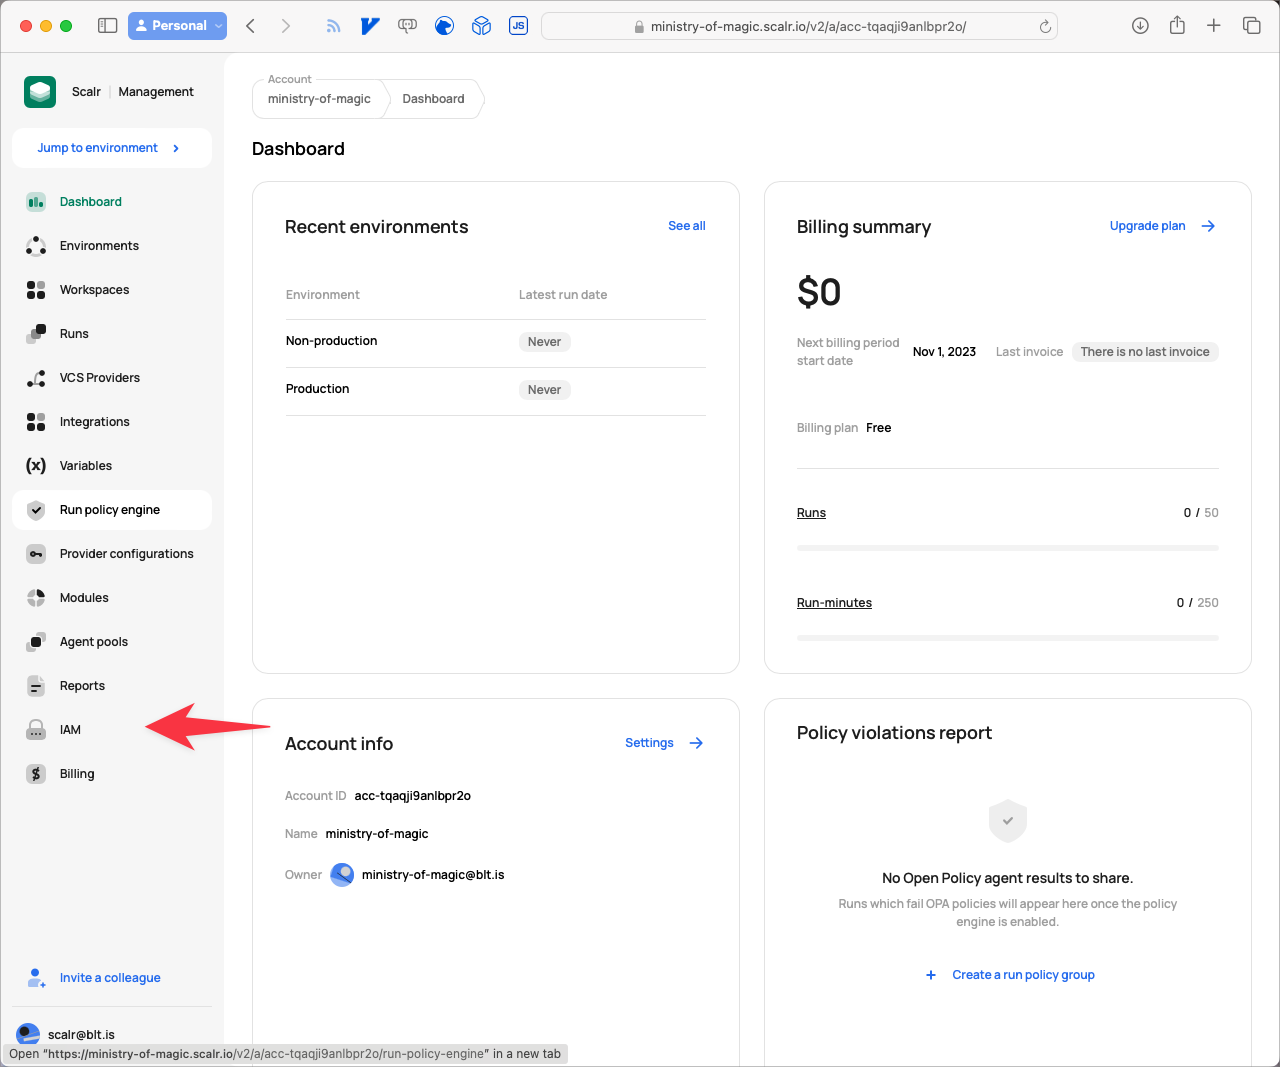
Navigate to IAM
- From the IAM page click on Service accounts.
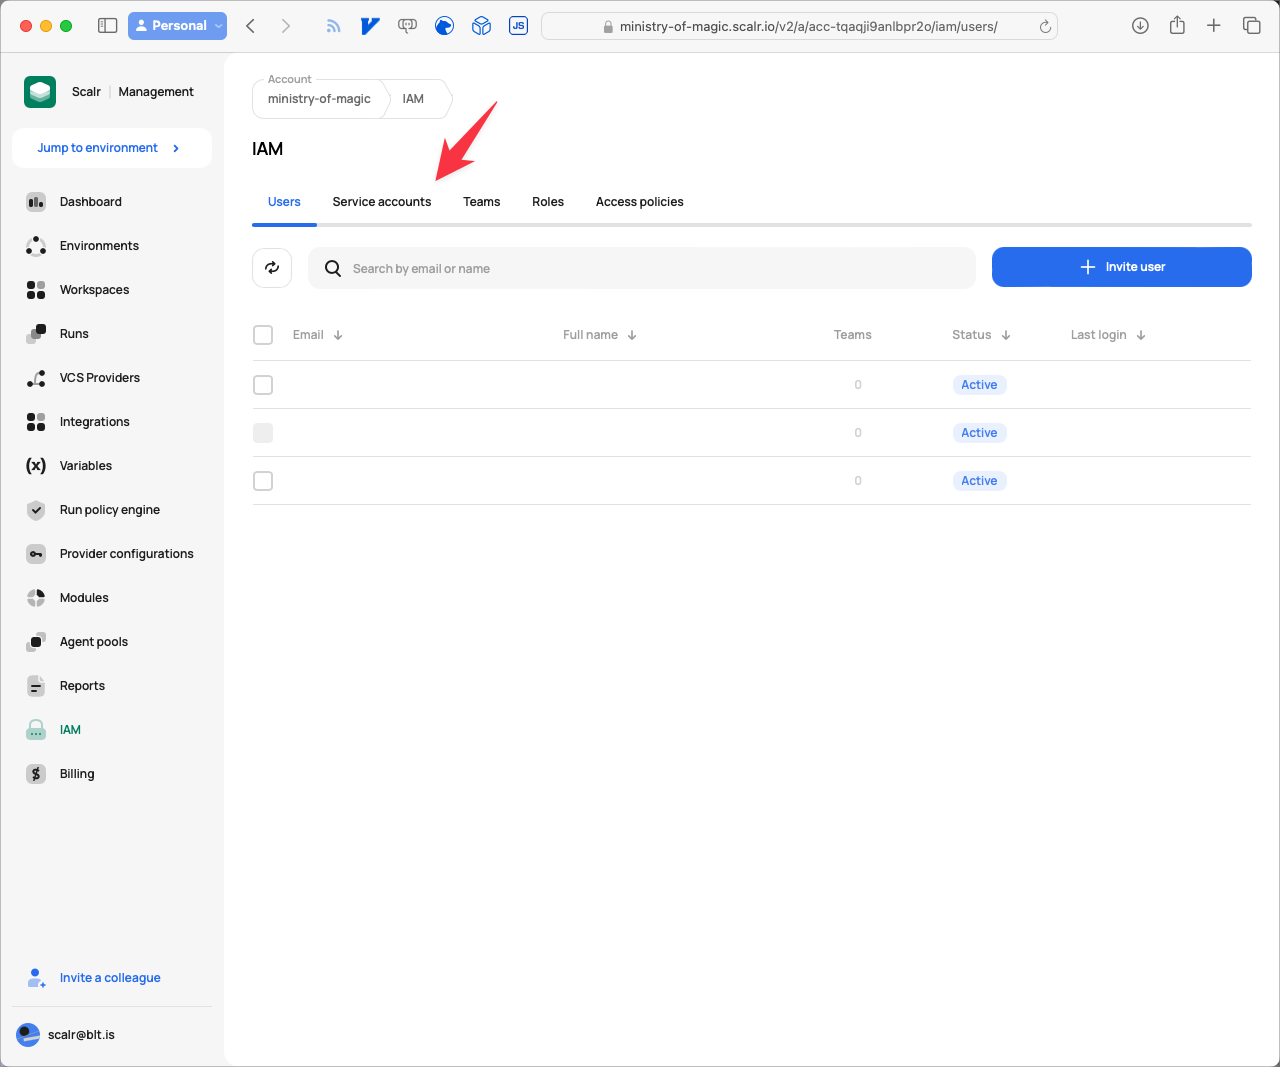
Navigating to the Service Accounts tab
- Click on New service account.
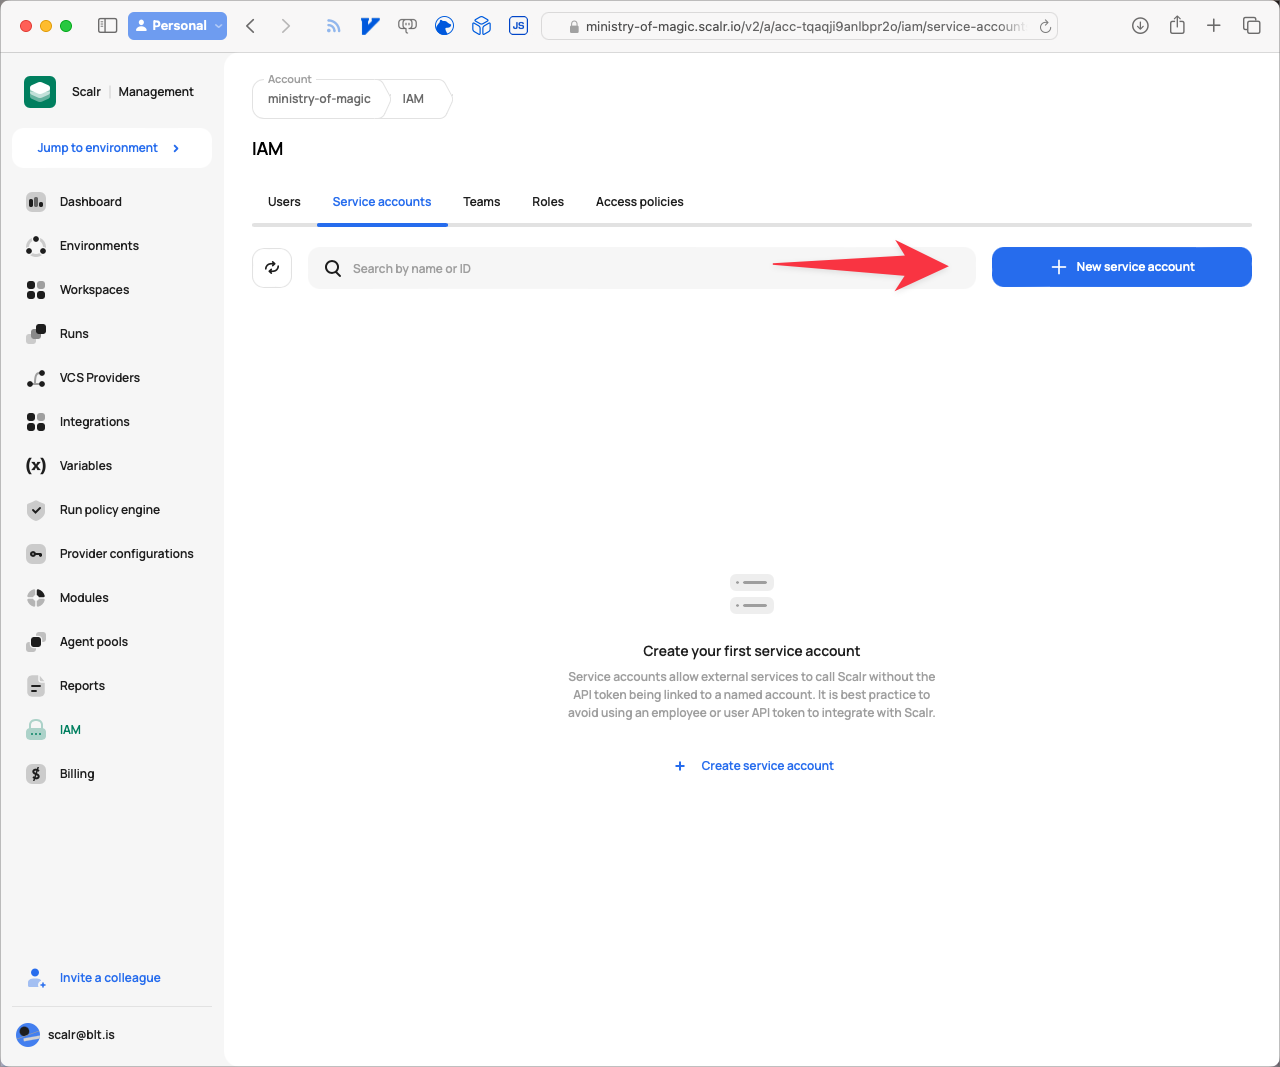
Creating a new service account
- Give the service account a meaningful Name, and then click on Grant access.
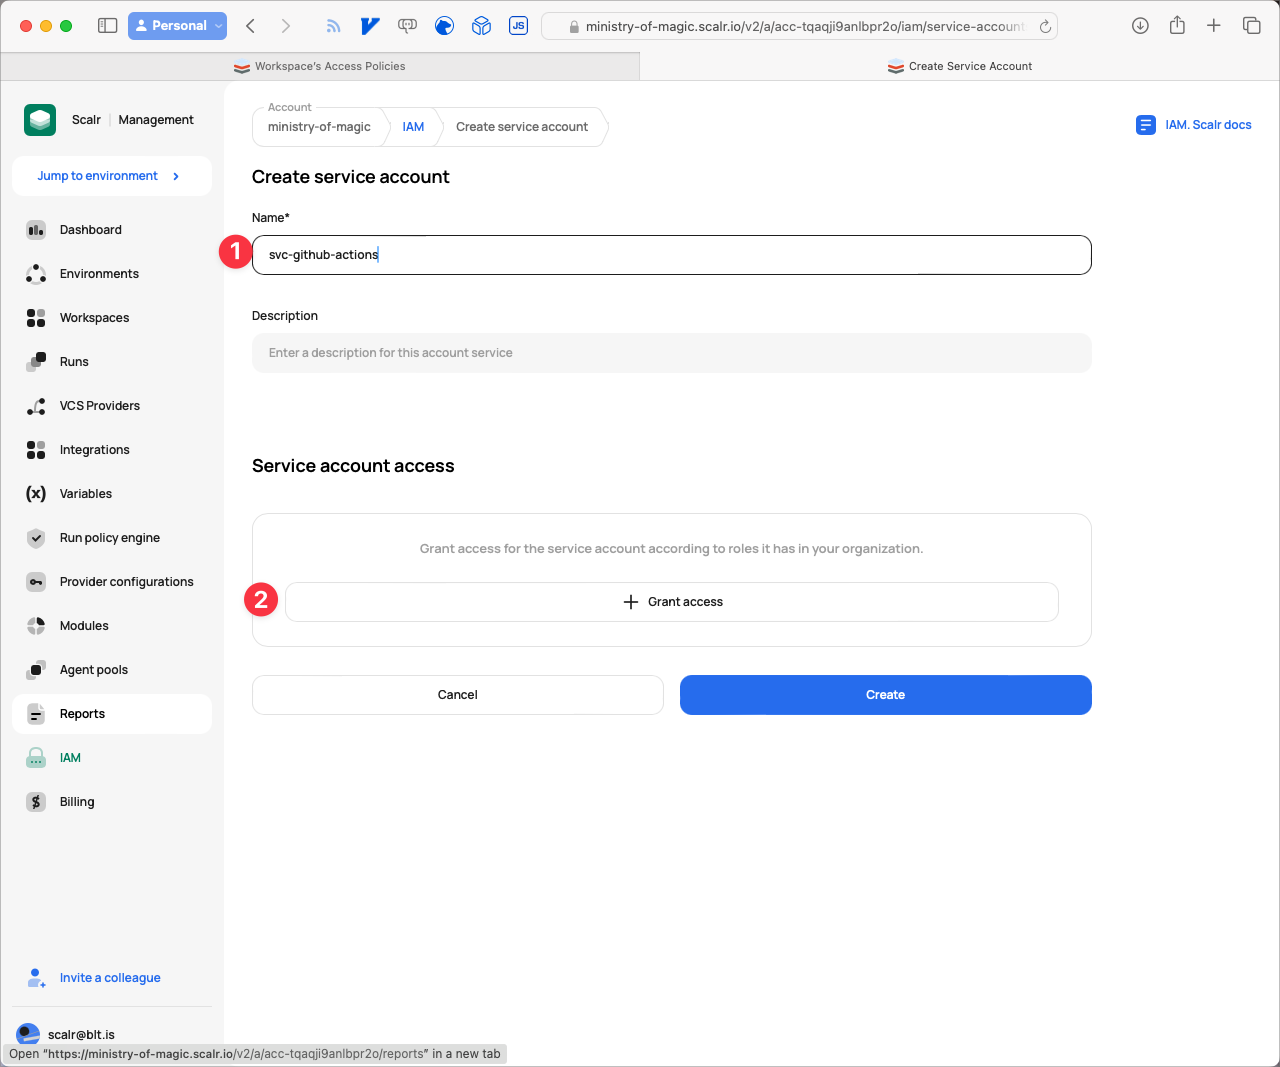
Granting access to the service account
- For this Service Account to work, we need to give it access to three different areas in Scalr. First, under Roles, give it
account-min-access, which lets the service account perform minimal operations on the account. Make sure Grant on is set to Account, then click Assign.
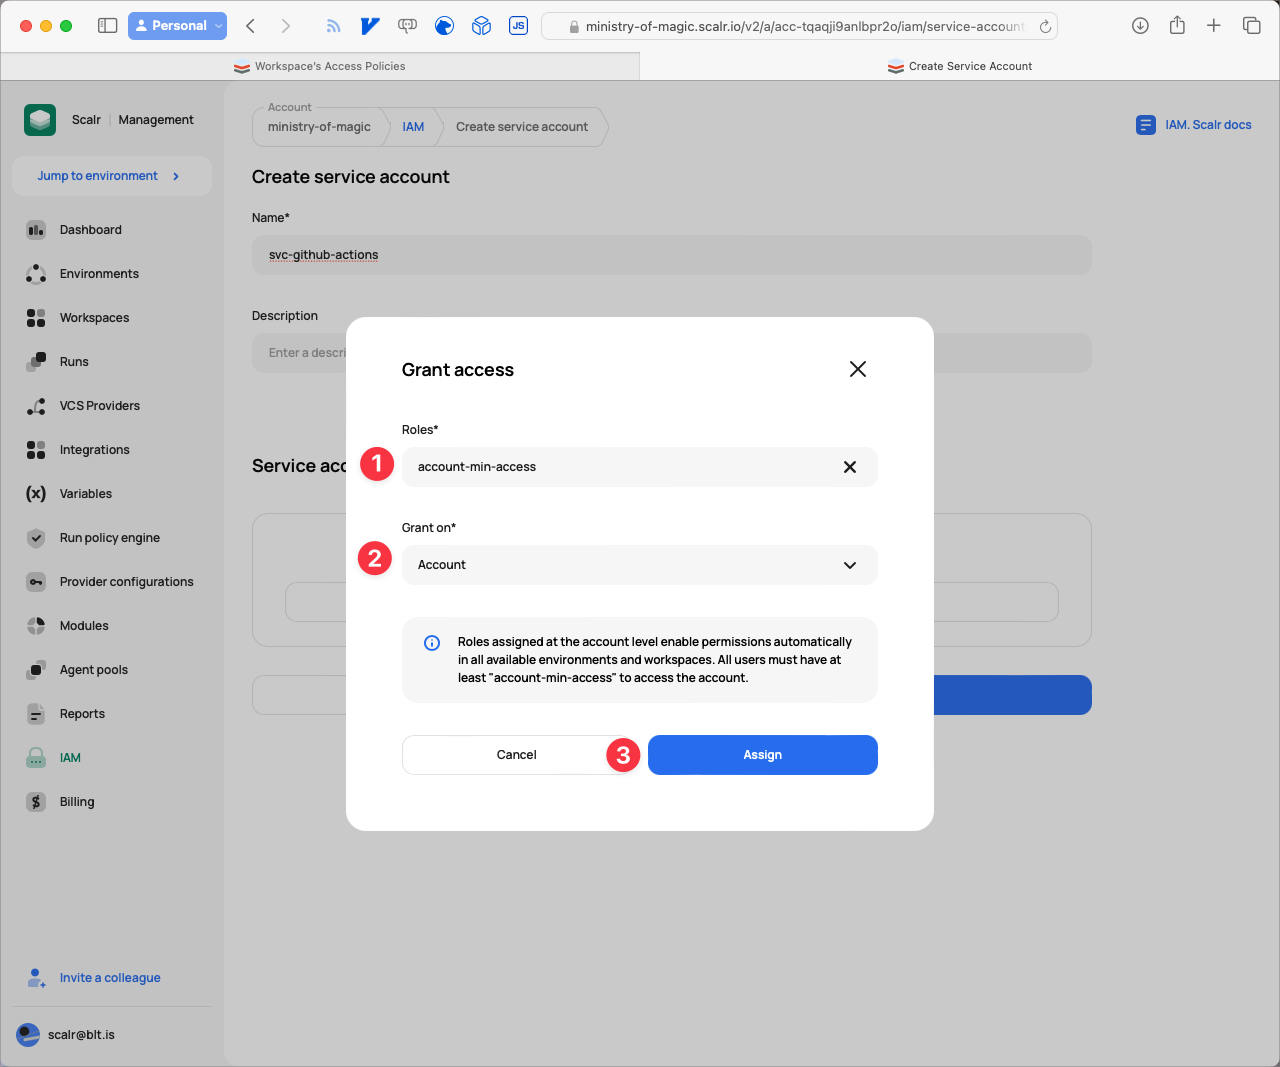
Assign account-min-access to the account
Next, give it access to the environment. Select environment-min-access from the Roles dropdown, Environment from Grant on, and then pick your environment name from the Environment dropdown. In our example that's Non-production. Click Assign.
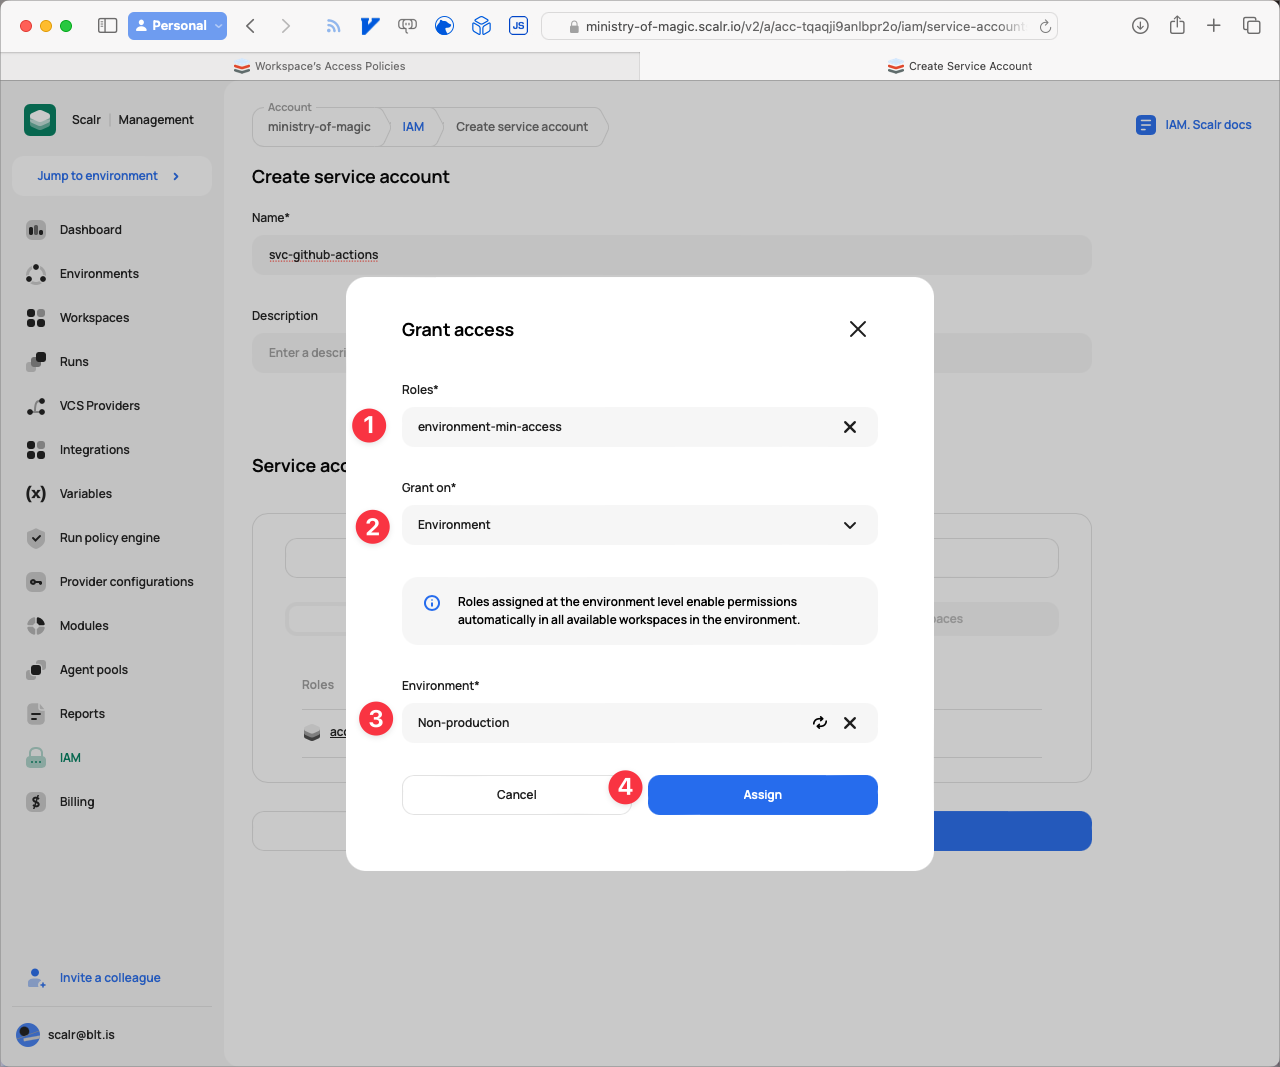
Assign environment-min-access to the environment
The last bit of access goes to the workspace we created. Under Roles select admin, for Grant on select Workspace, for Environment select your environment (e.g. Non-production), then pick the workspace from the Workspace dropdown and click Assign.
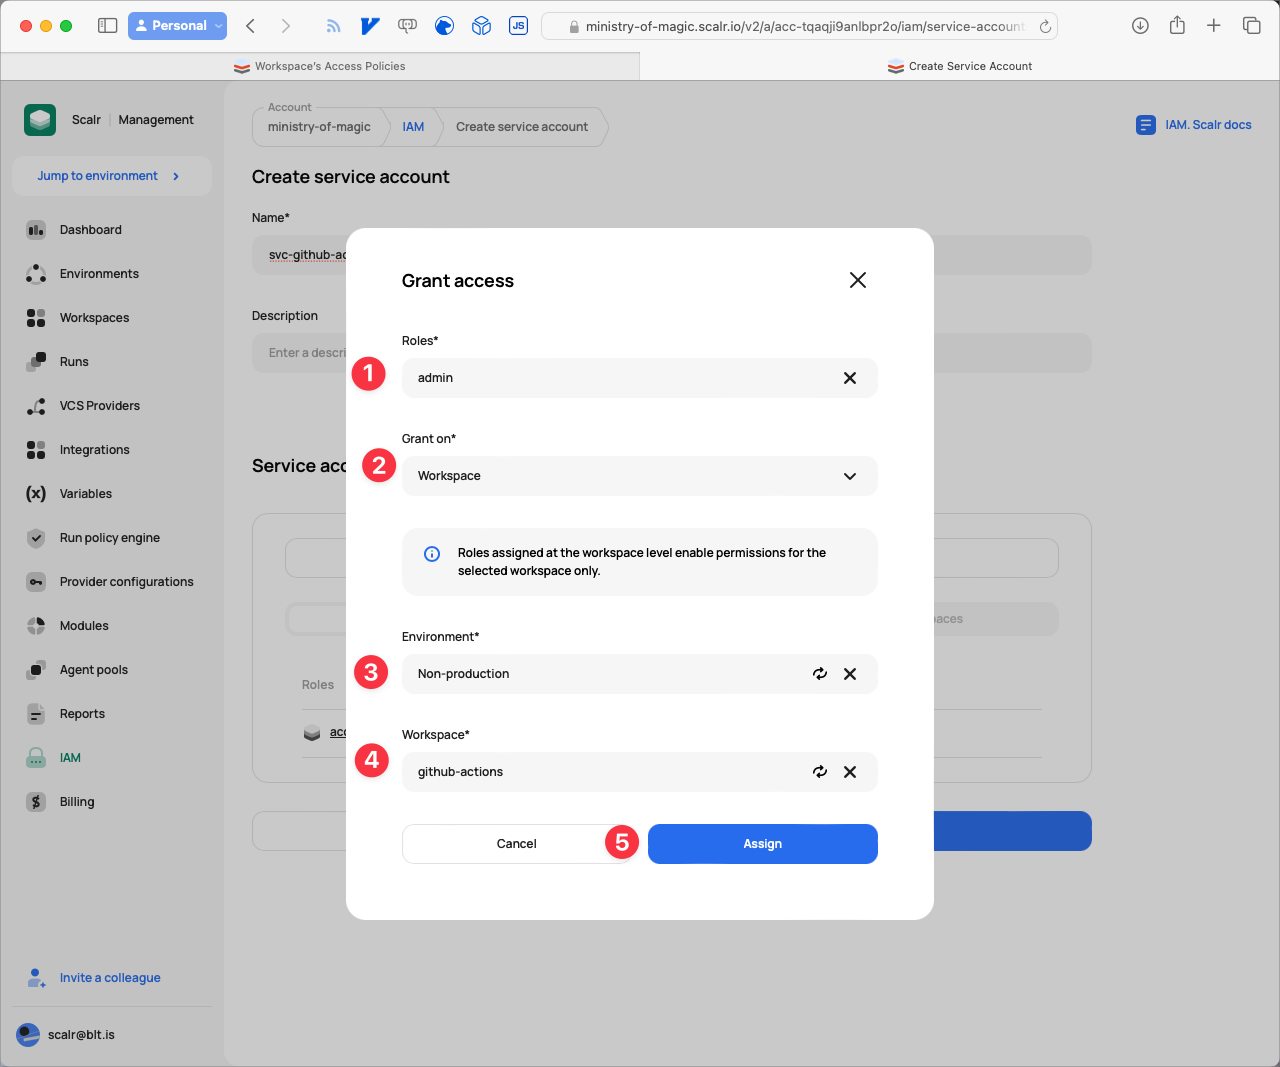
Assign admin to the workspace
- Now that the access is set up for the Service Account, we need to generate a token. Click the Generate token button.
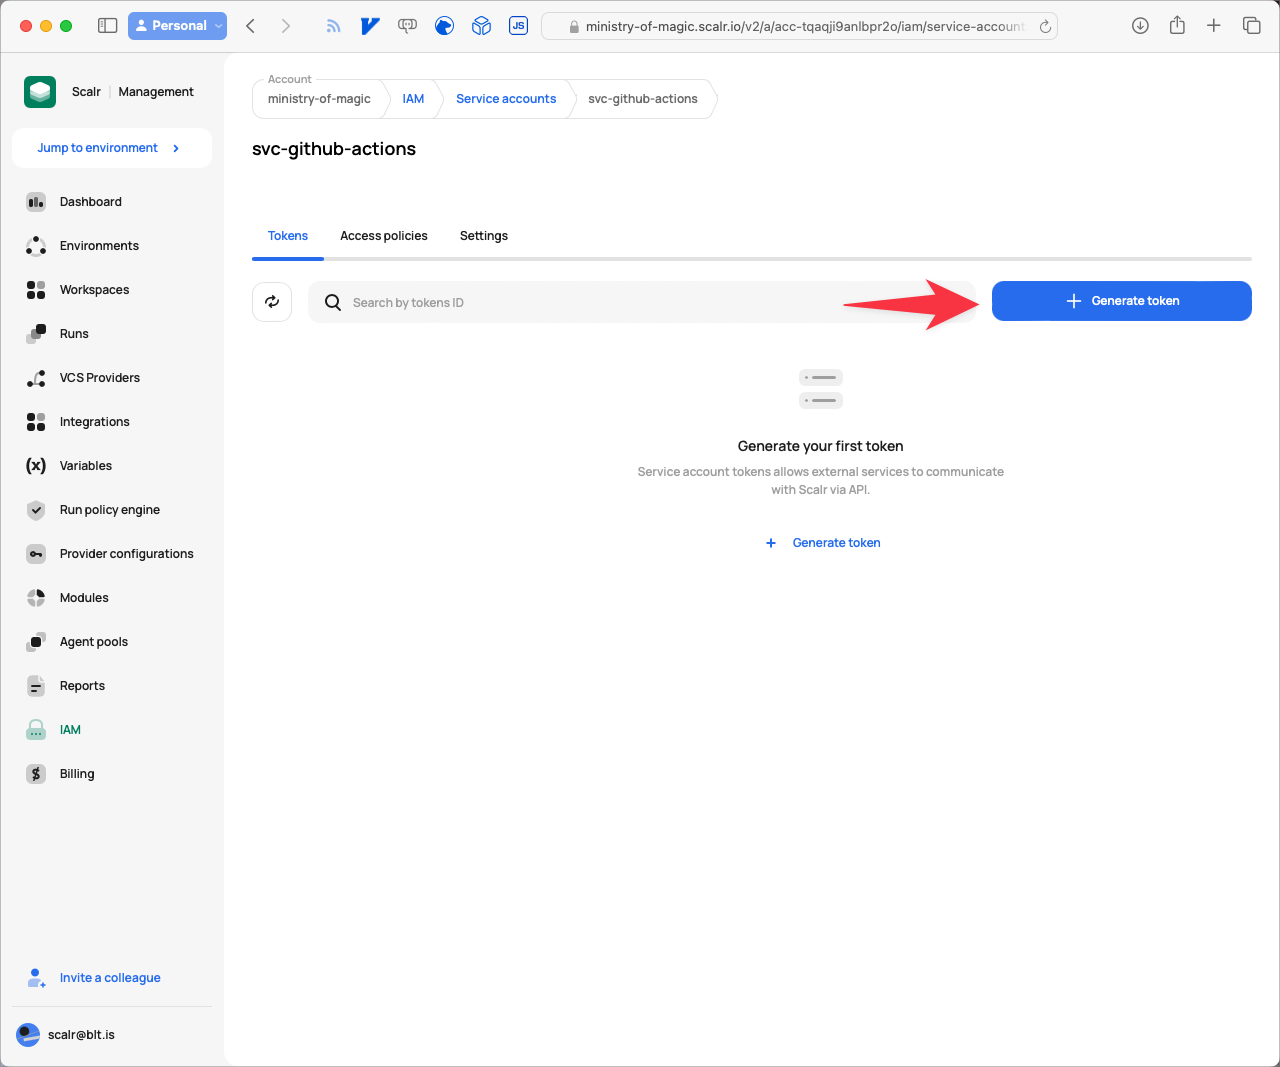
Generate a token for the service account
- Give the Token a Description that is meaningful should you require and click Copy and Save.
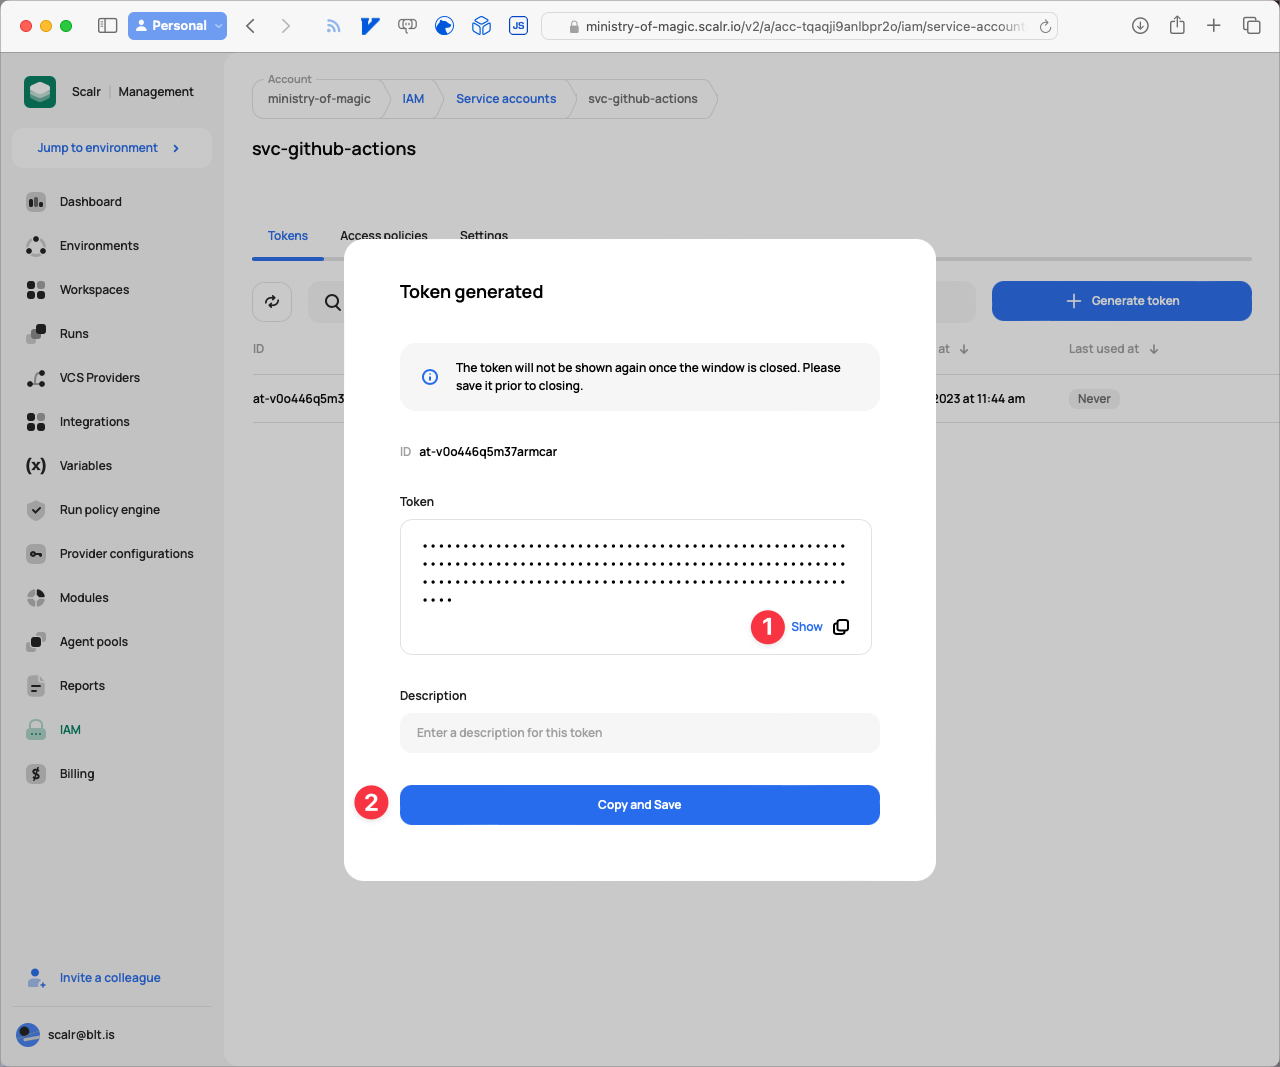
Copy and save the token
Now that we have all the pieces together, we'll add them to GitHub in the next section.
How Do You Add the Scalr Token as a GitHub Secret?
For the GitHub setup we just add the Token we generated in Scalr. This lets GitHub Actions perform state storage operations on our workspace.
- From your repository root click on Settings.
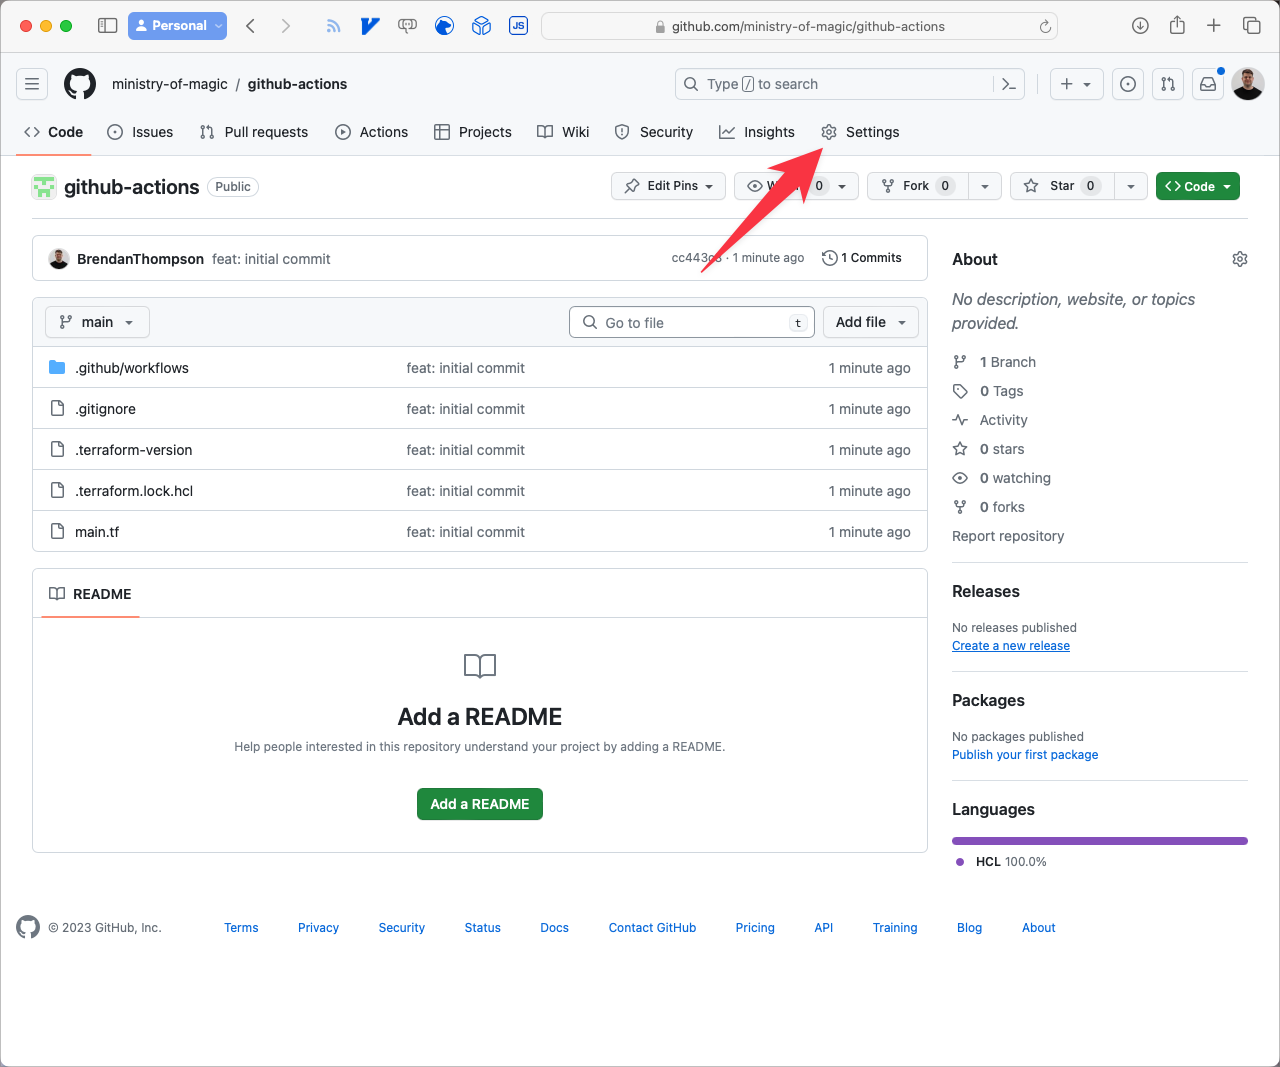
Navigate to setting in Github
- Click the disclosure on the Secrets and variables menu item.
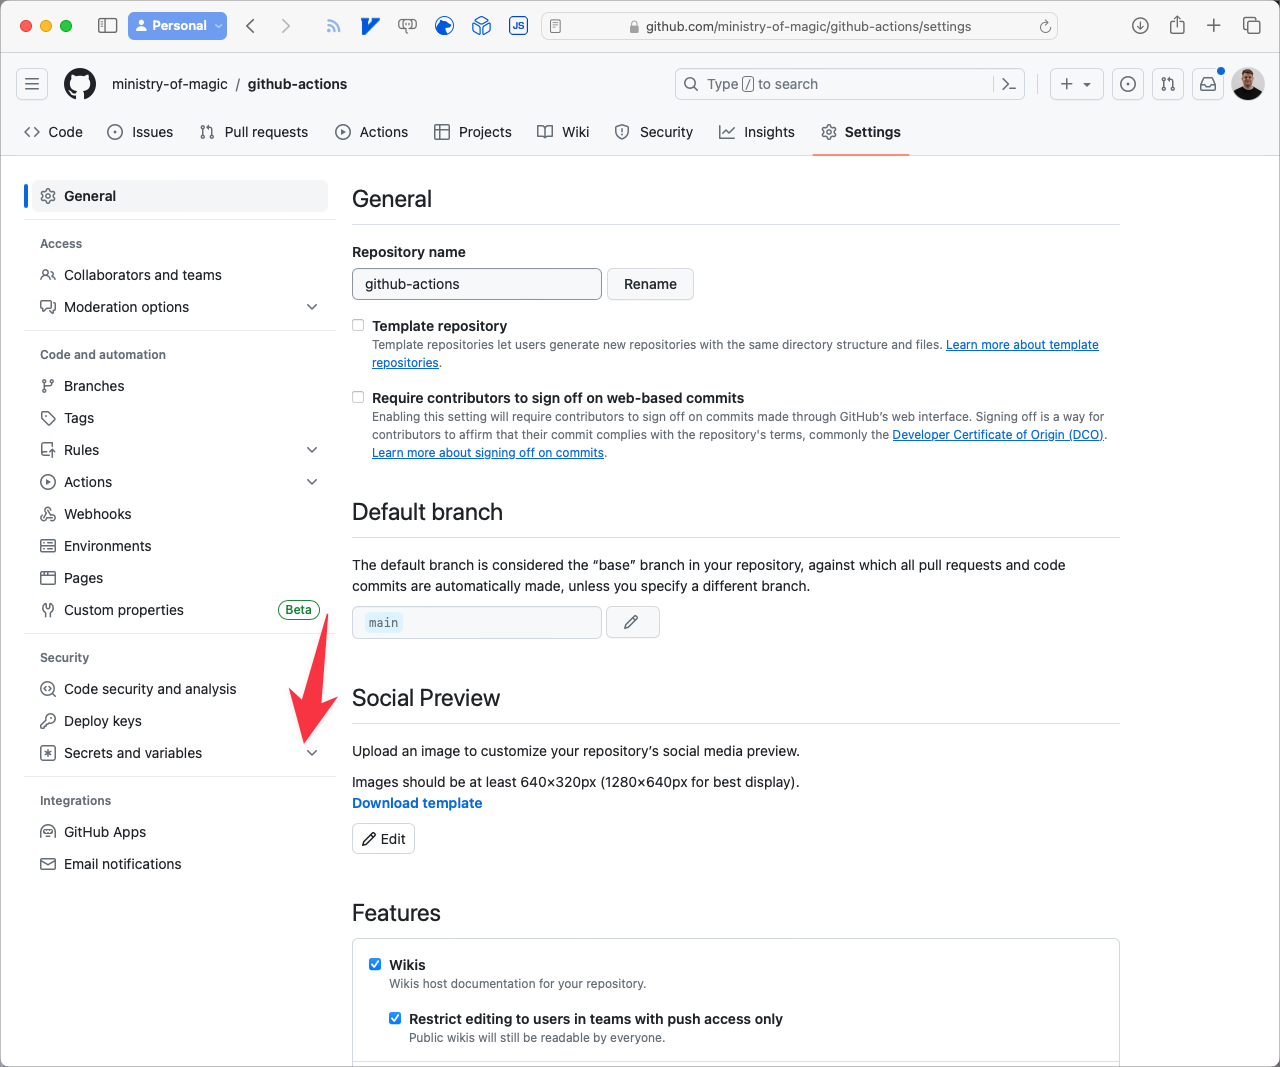
Navigate to Secrets & Variables
- Click Actions.
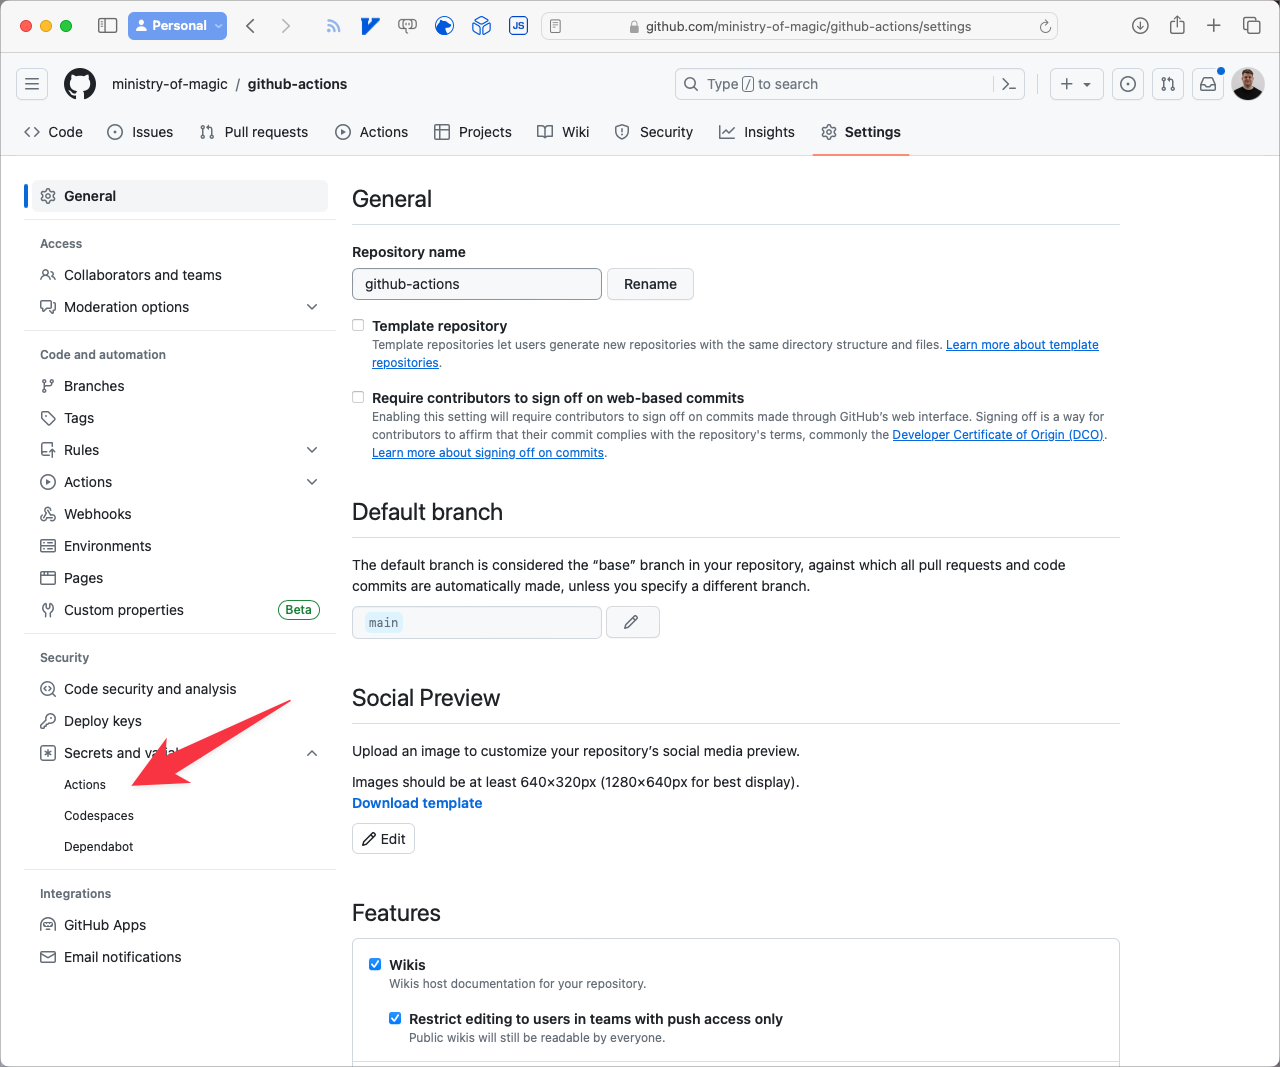
Navigate to Actions
- Click on New repository secret.

New Repository Secret
For the Name field we need to set that as SCALR_TOKEN, the Secret should be set to whatever Token value you copied from Scalr, finally click Add secret.
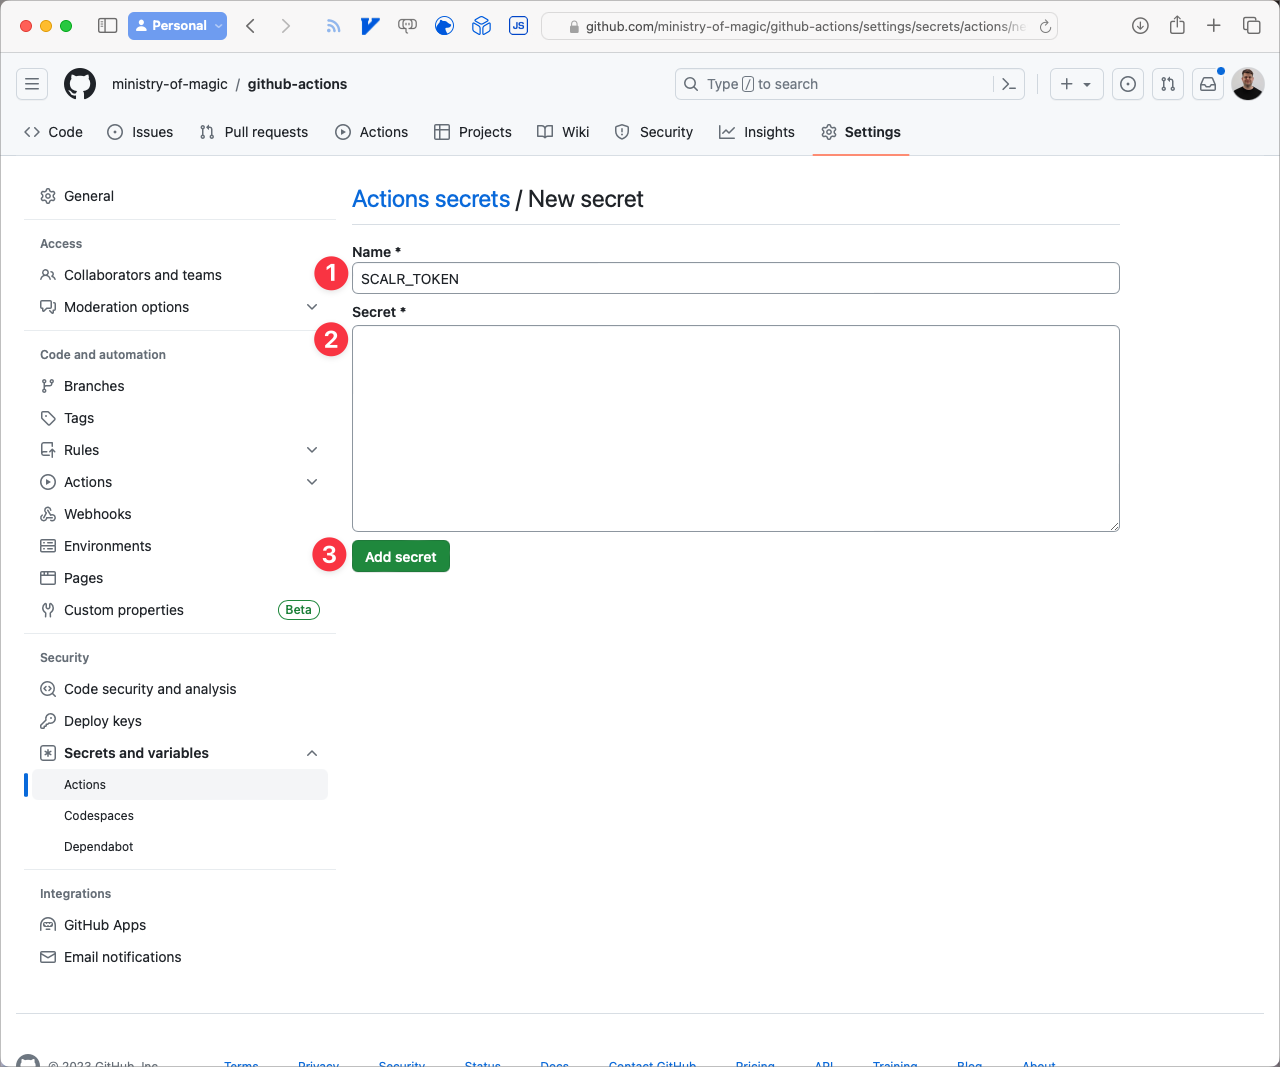
Add a new secret
What Do the Terraform Backend Config and GitHub Actions Workflow Look Like?
Our environment is now set up and ready for the Terraform code and the GitHub Actions workflow. Let's take a quick look at the Terraform code first. It provisions a scratch resource and outputs its value. We'll break the code up a little.
First, we need our version of Terraform set to less than v1.6. Here we'll use v1.5.6.
terraform {
  required_version = "1.5.6"

  # ...
}
Next we tell Terraform to use Scalr as our backend. There are three properties you need to set:
hostname: the Scalr URL to your Organization.organization: the Environment ID from your Scalr Organisation.name: the name of the Workspace that the code is going to be deployed into.
If you're interested in learning about how you can set some of these more dynamically I would recommend reading: How to set Terraform backend configuration dynamically
terraform {
  # ...

  backend "remote" {
    hostname = "ministry-of-magic.scalr.io"
    organization = "env-tqaqjimtnmmgiv0"

    workspaces {
      name = "github-actions"
    }
  }

  # ...
}
From the Scalr Workspace dashboard page you can get the Workspace configuration by clicking on Remote backend configuration.
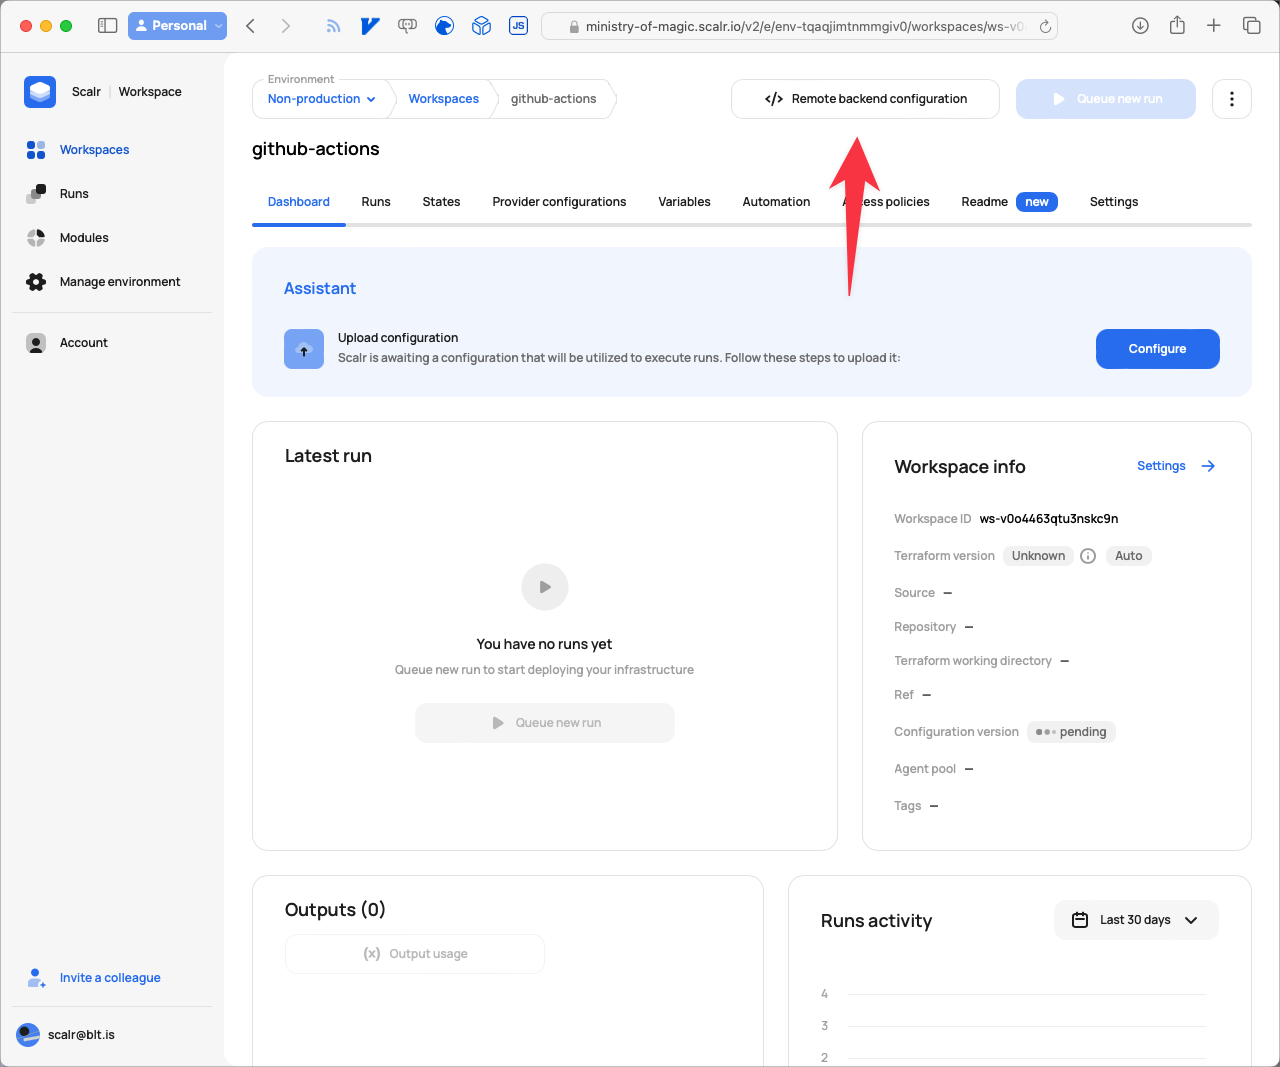
Navigate to the remote backend configuration
This will show the following modal with the details that can be copied and pasted into your editor:
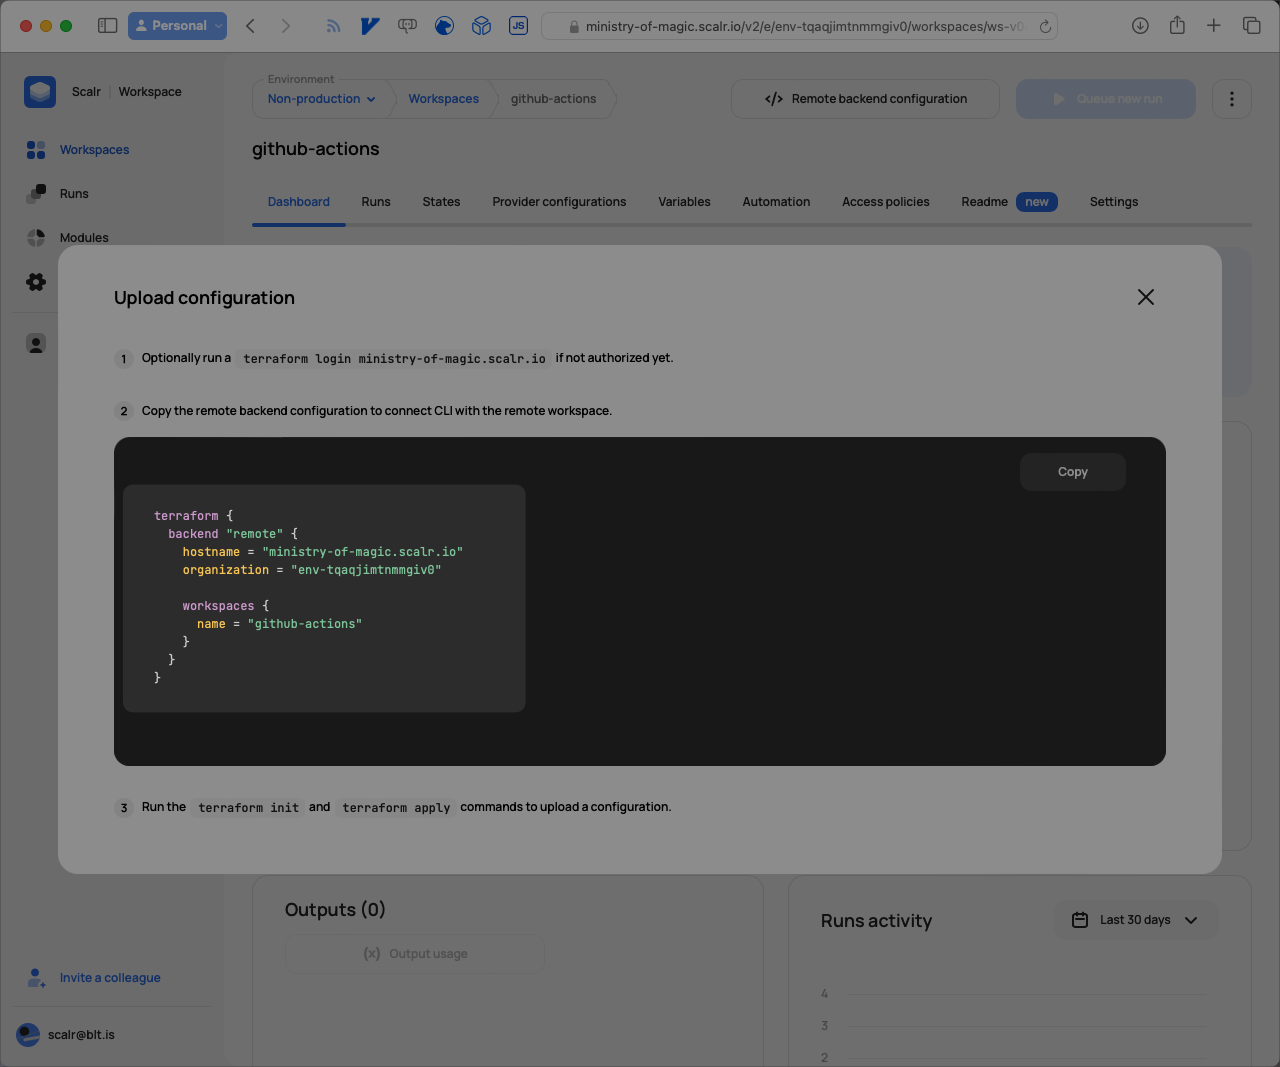
Configuration details to copy
The last thing our terraform block needs is required_providers. This tells Terraform where to download the provider from, and what version constraints to apply if you define any.
terraform {
  # ...

  required_providers {
    scratch = {
      source = "BrendanThompson/scratch"
    }
  }
}
With all of that in place, the following will store its state in the remote backend we defined earlier.
resource "scratch_string" "this" {
  in = "Hello, GitHub Actions"
}

output "github_actions_string" {
  value = scratch_string.this.in
}
Like I said, it's a very simple root module. All it does is print a message to the output. Next we'll look at the GitHub Actions (GHA) workflow file. This file MUST live in the .github/workflows directory in your repository.
name: Scalr
on:
  push:
    branches:
      - main
jobs:
  deploy:
    name: Deploy
    runs-on: ubuntu-latest
    steps:
    - name: Checkout code
      uses: actions/checkout@v2
    - uses: Scalr/scalr-action@v1
      with:
        scalr_hostname: 'ministry-of-magic.scalr.io'
        scalr_token: ${{ secrets.SCALR_TOKEN }}
        terraform_output: true
        terraform_version: '1.5.6'

    - run: terraform init

    - id: plan
      run: terraform plan

    - run: echo "${{ steps.plan.outputs.stdout }}"
    - run: echo "${{ steps.plan.outputs.stderr }}"
    - run: echo "${{ steps.plan.outputs.exitcode }}"

    - id: apply
      run: terraform apply -auto-approve

    - run: echo ${{ steps.apply.outputs.github_actions_string }}
This is a very basic GHA workflow where any push to the main branch triggers a run. First we check out the Terraform code from the repository using actions/checkout@v2, then we set up the Scalr environment on the runner with the Scalr/scalr-action@v1 action. That's where we provide the Scalr Organisation and Token, and optionally a Terraform version. If you don't give it a version, Scalr will try to work it out for itself.
The next steps should look fairly familiar:
terraform init: initialises our code, pulls providers and modules as well as setting up connectivity to the backend.terraform plan: plan our version of the code against what exists in production.terraform apply: applies any changes to the environment.
The echo steps just print useful information back to us. You can read more about the action on the Scalr Github Action page.
What Happens When the GitHub Actions Run Triggers?
Now that everything is set up and linked together, pushing a change to GitHub triggers a run. From the repository root, after you push a change, click the little orange dot next to the commit.
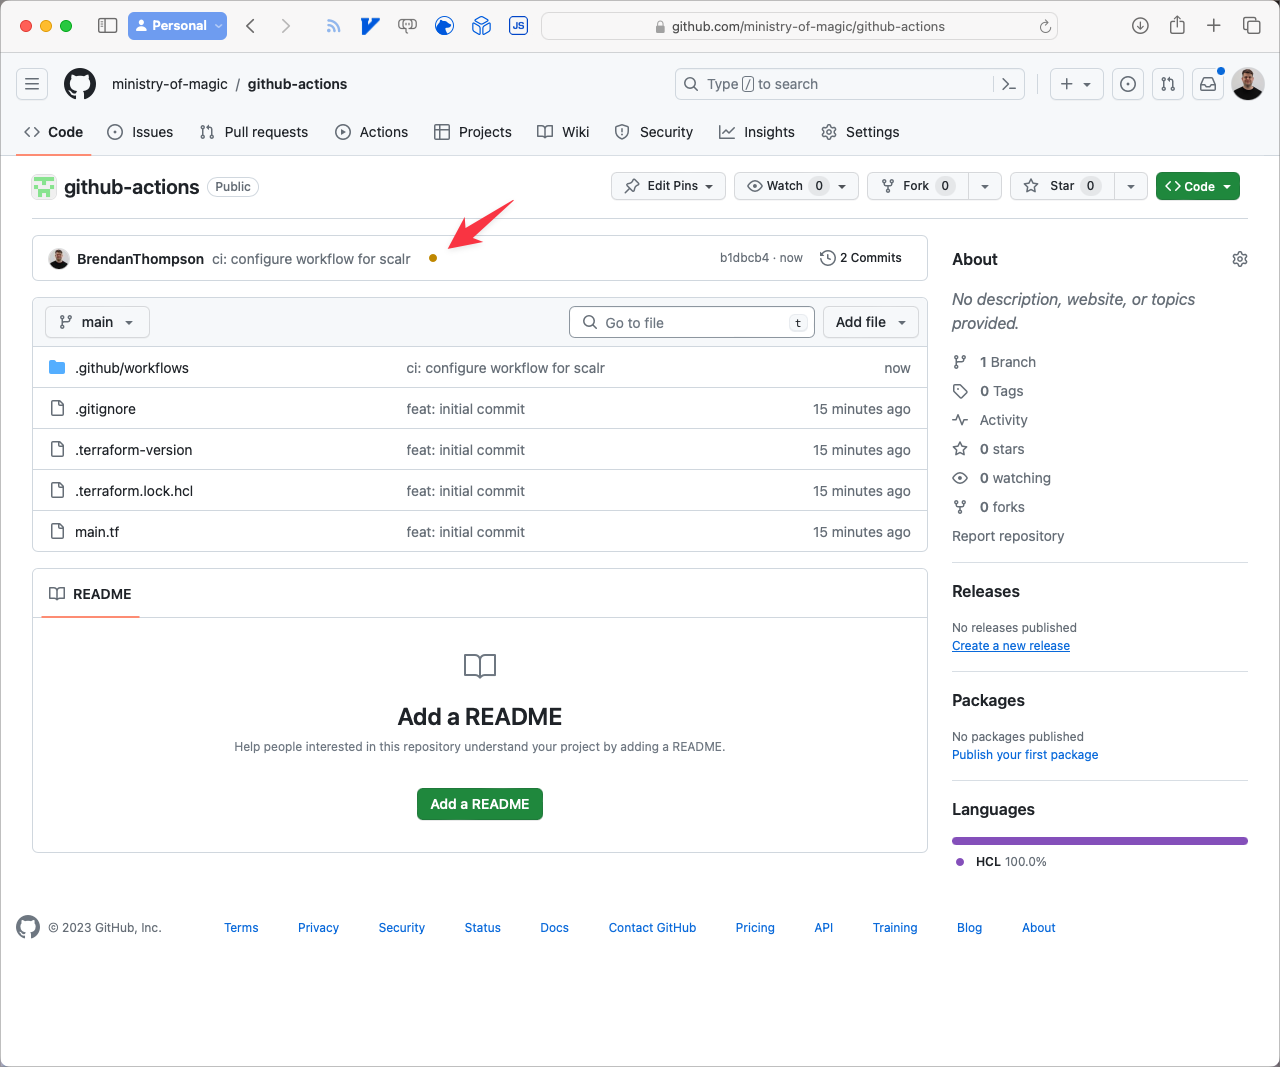
This brings up a small modal, click on Details.

From here you can see a full summary of what is going on:
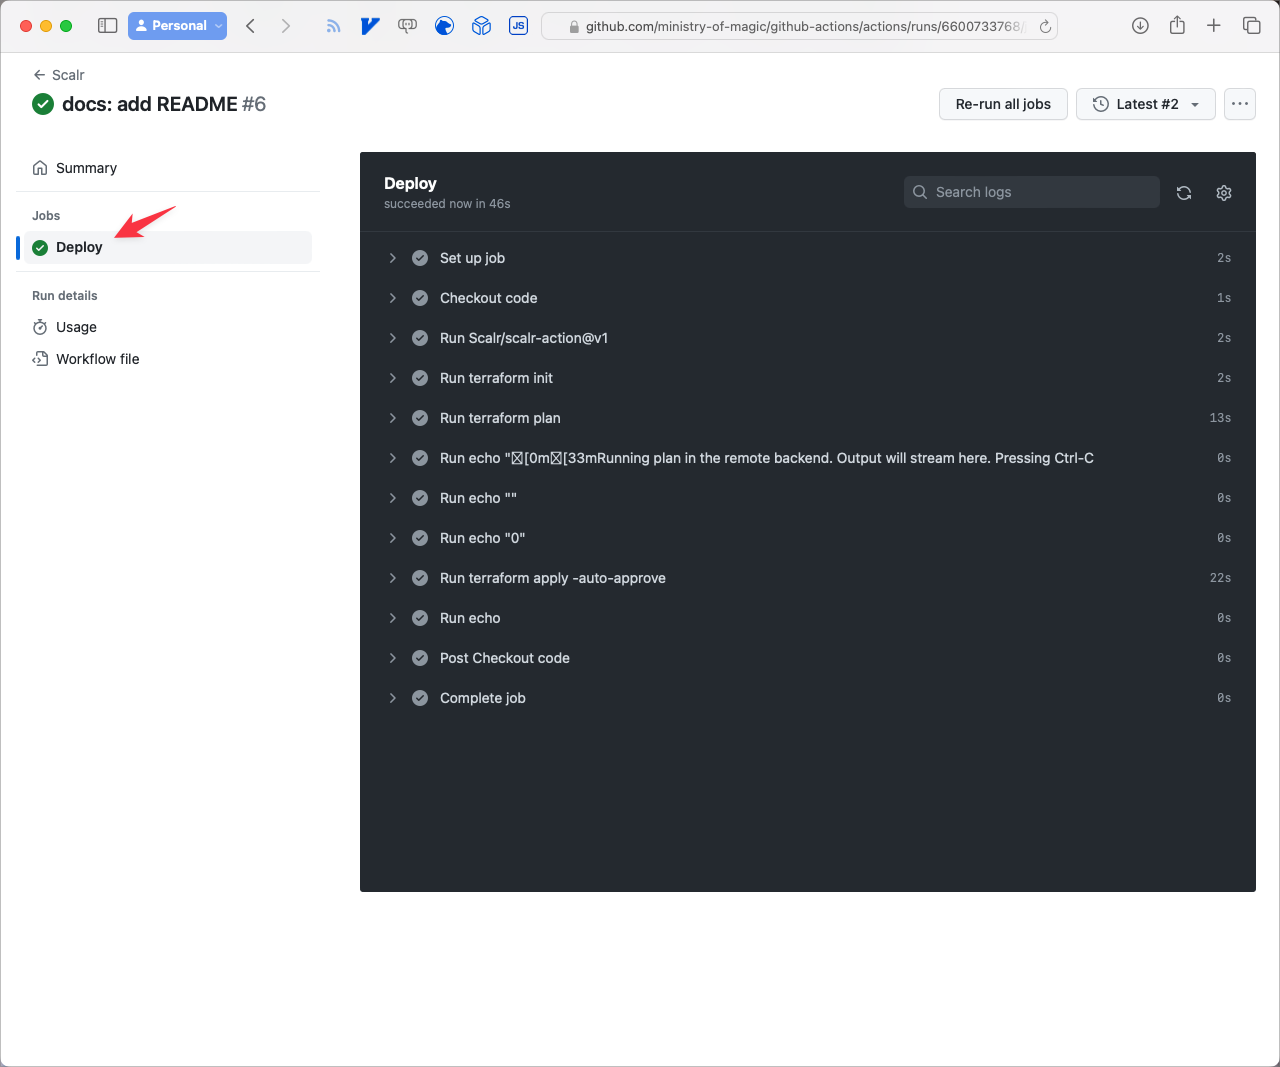
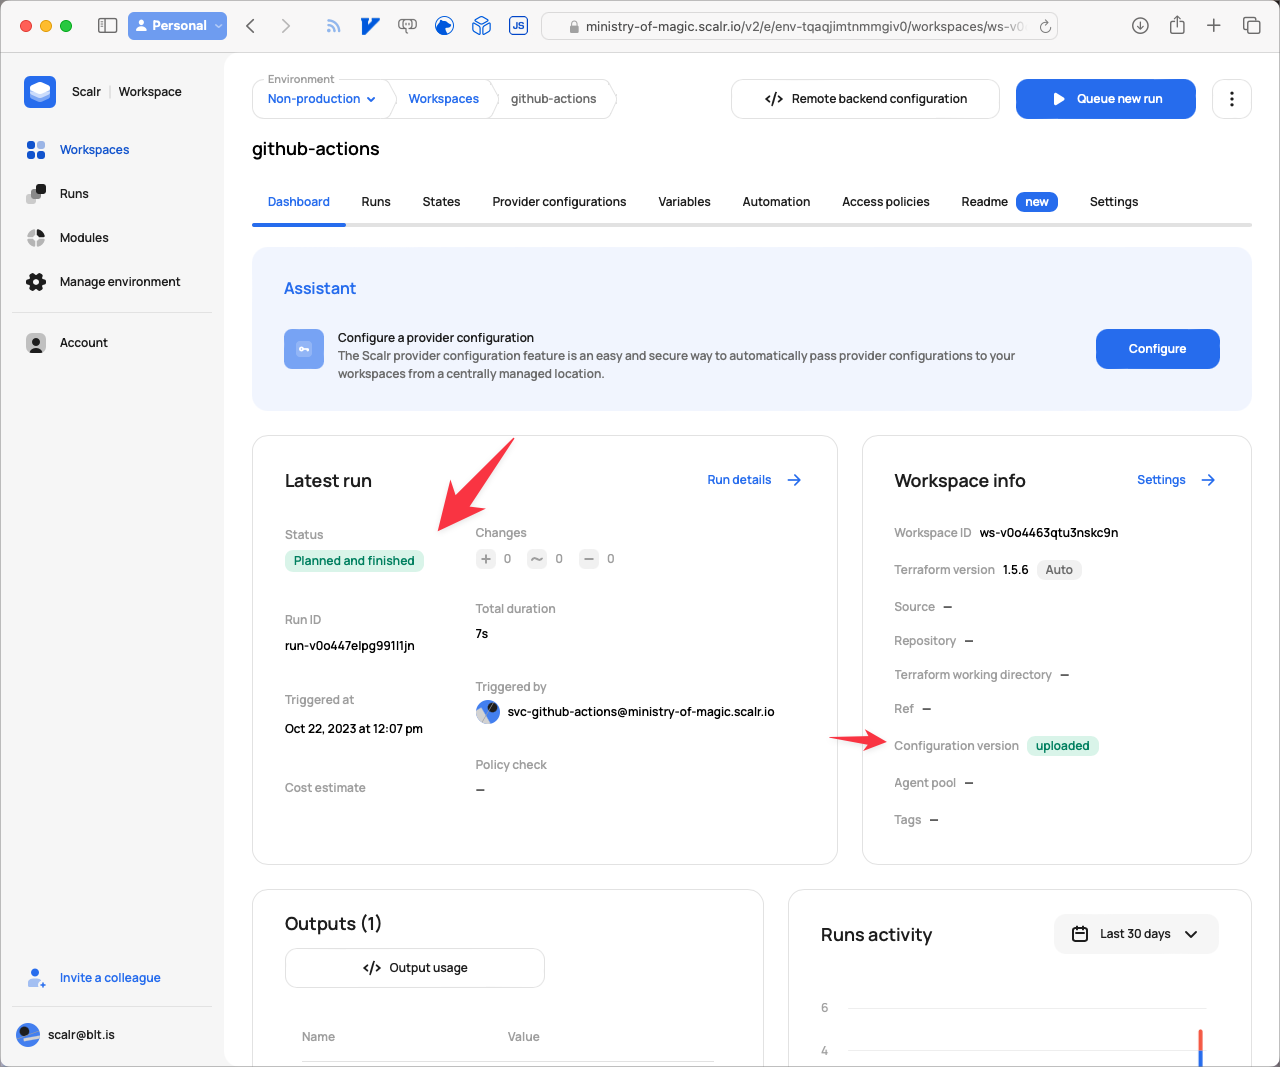
Once the Job has finished you can go back to Scalr to see what's happened:
Is Scalr a Good Fit for Storing Your Terraform State?
We've set up a GitHub repository that holds Terraform code, uses Scalr to store the state, and runs everything through GitHub Actions. If you're starting out with Terraform and want a free, highly-available place to keep your state, this is a reasonable way to do it. Terraform state is easy to take for granted until something goes wrong with it, so keeping it somewhere reliable matters more than it first appears.

CI/CD and GitOps for Terraform & OpenTofu
Comprehensive guide to building reliable CI/CD pipelines and implementing GitOps workflows for Terraform and OpenTofu infrastructure automation.